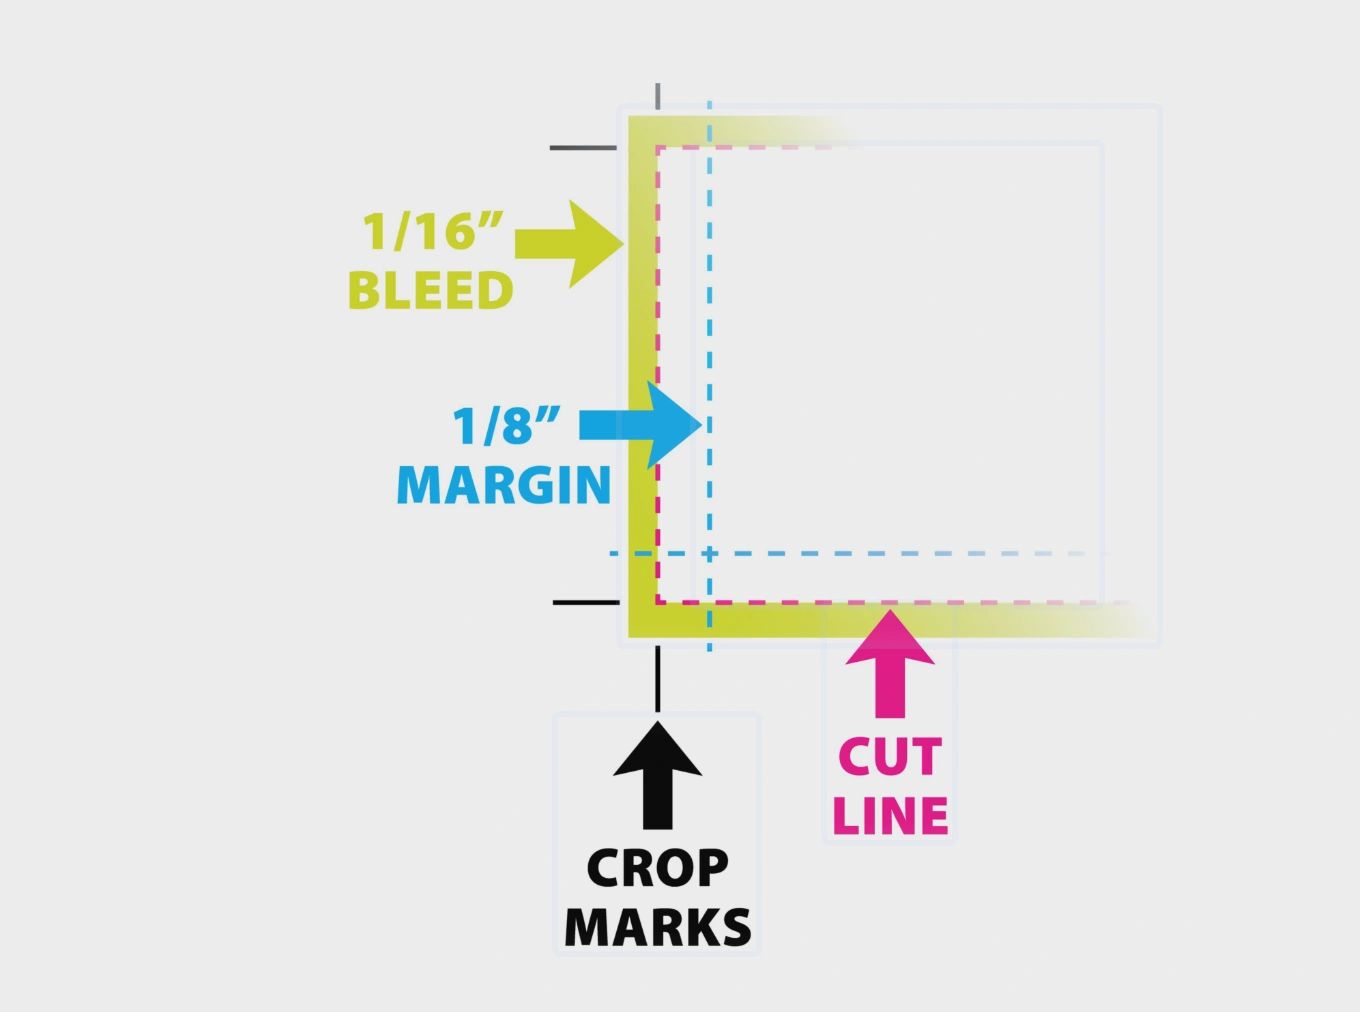
When you hear the term 'bleed' in the printing world, it simply refers to the area of your design that is trimmed off after the printing process is finished.
Why do we use bleed?
The primary reason for including a bleed area is to ensure your artwork reaches the very edge of the final product. Without it, even the slightest movement during the cutting process could leave a thin, unprinted white line around the border of your item.
By extending your design slightly beyond the final dimensions, you guarantee a professional, edge-to-edge finish.
Standard Allowance: For most photo prints, we require a 3mm bleed on all sides.
Full Bleed: We are capable of printing at full bleed for all image sizes to give your products a high-end look.
Managing Bleed on Papello
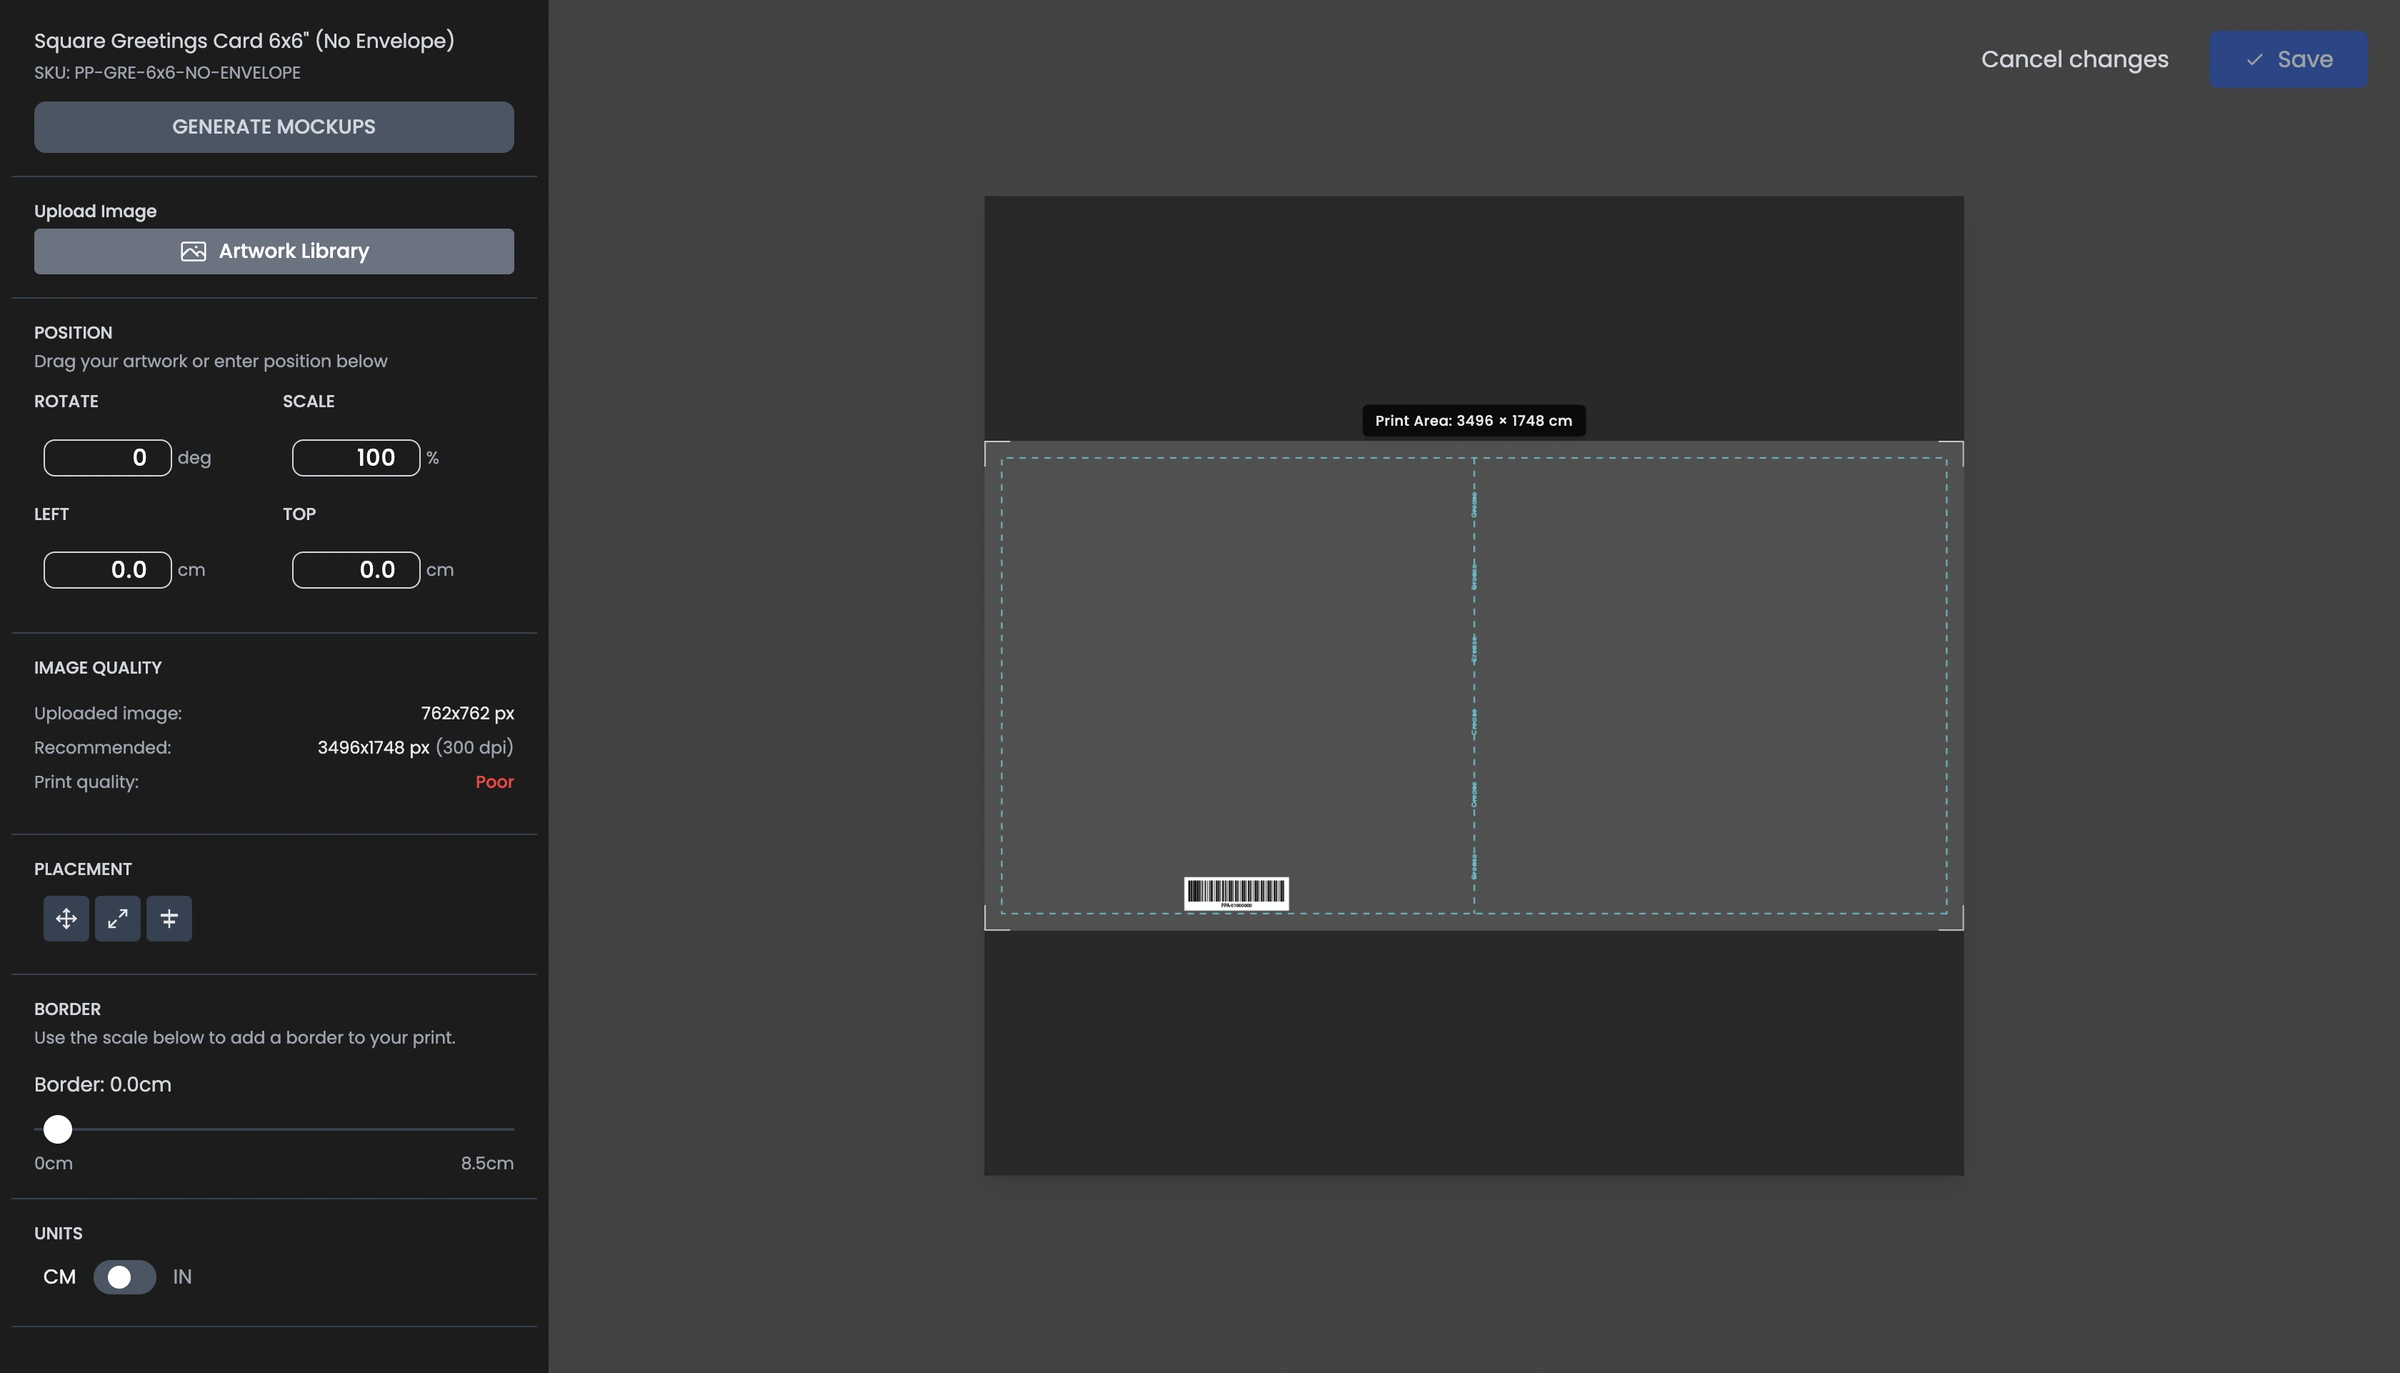
When you upload your files to our platform, you have total control over how they are positioned:
Cropping: You can use our built-in tools to crop your image and remove any unwanted bleed areas if necessary.
Borders: If your design features a specific border, please ensure this is included within your file before you upload it. The system will treat the border as part of the overall artwork.
Safe Zones: Always keep important text or essential parts of your design away from the very edge of the bleed area to ensure they are not cut off during trimming.
When you add an image to a product, the bleed settings will be visible in the image editor for products that use a bleed. Highlighted below as the space outside the blue lines.
A Quick Checklist
Check your dimensions: Ensure your file is 6mm wider and 6mm taller than the final product size (3mm on each side).
Fill the space: Make sure your background colours or images extend all the way to the edge of the bleed area.
Not all products require bleed: You can download product templates or use the Templates Image Editor to check for bleed settings.
Review the preview: Use our mockup tool to see how your design will sit on the final product before you commit to the listing.