When we print your artwork, we generally do so with a full bleed. This means your design is printed right to the very edge of the paper or material. If you want a white border to appear around your image, you have several easy ways to achieve this.
Using the Papello Image Editor
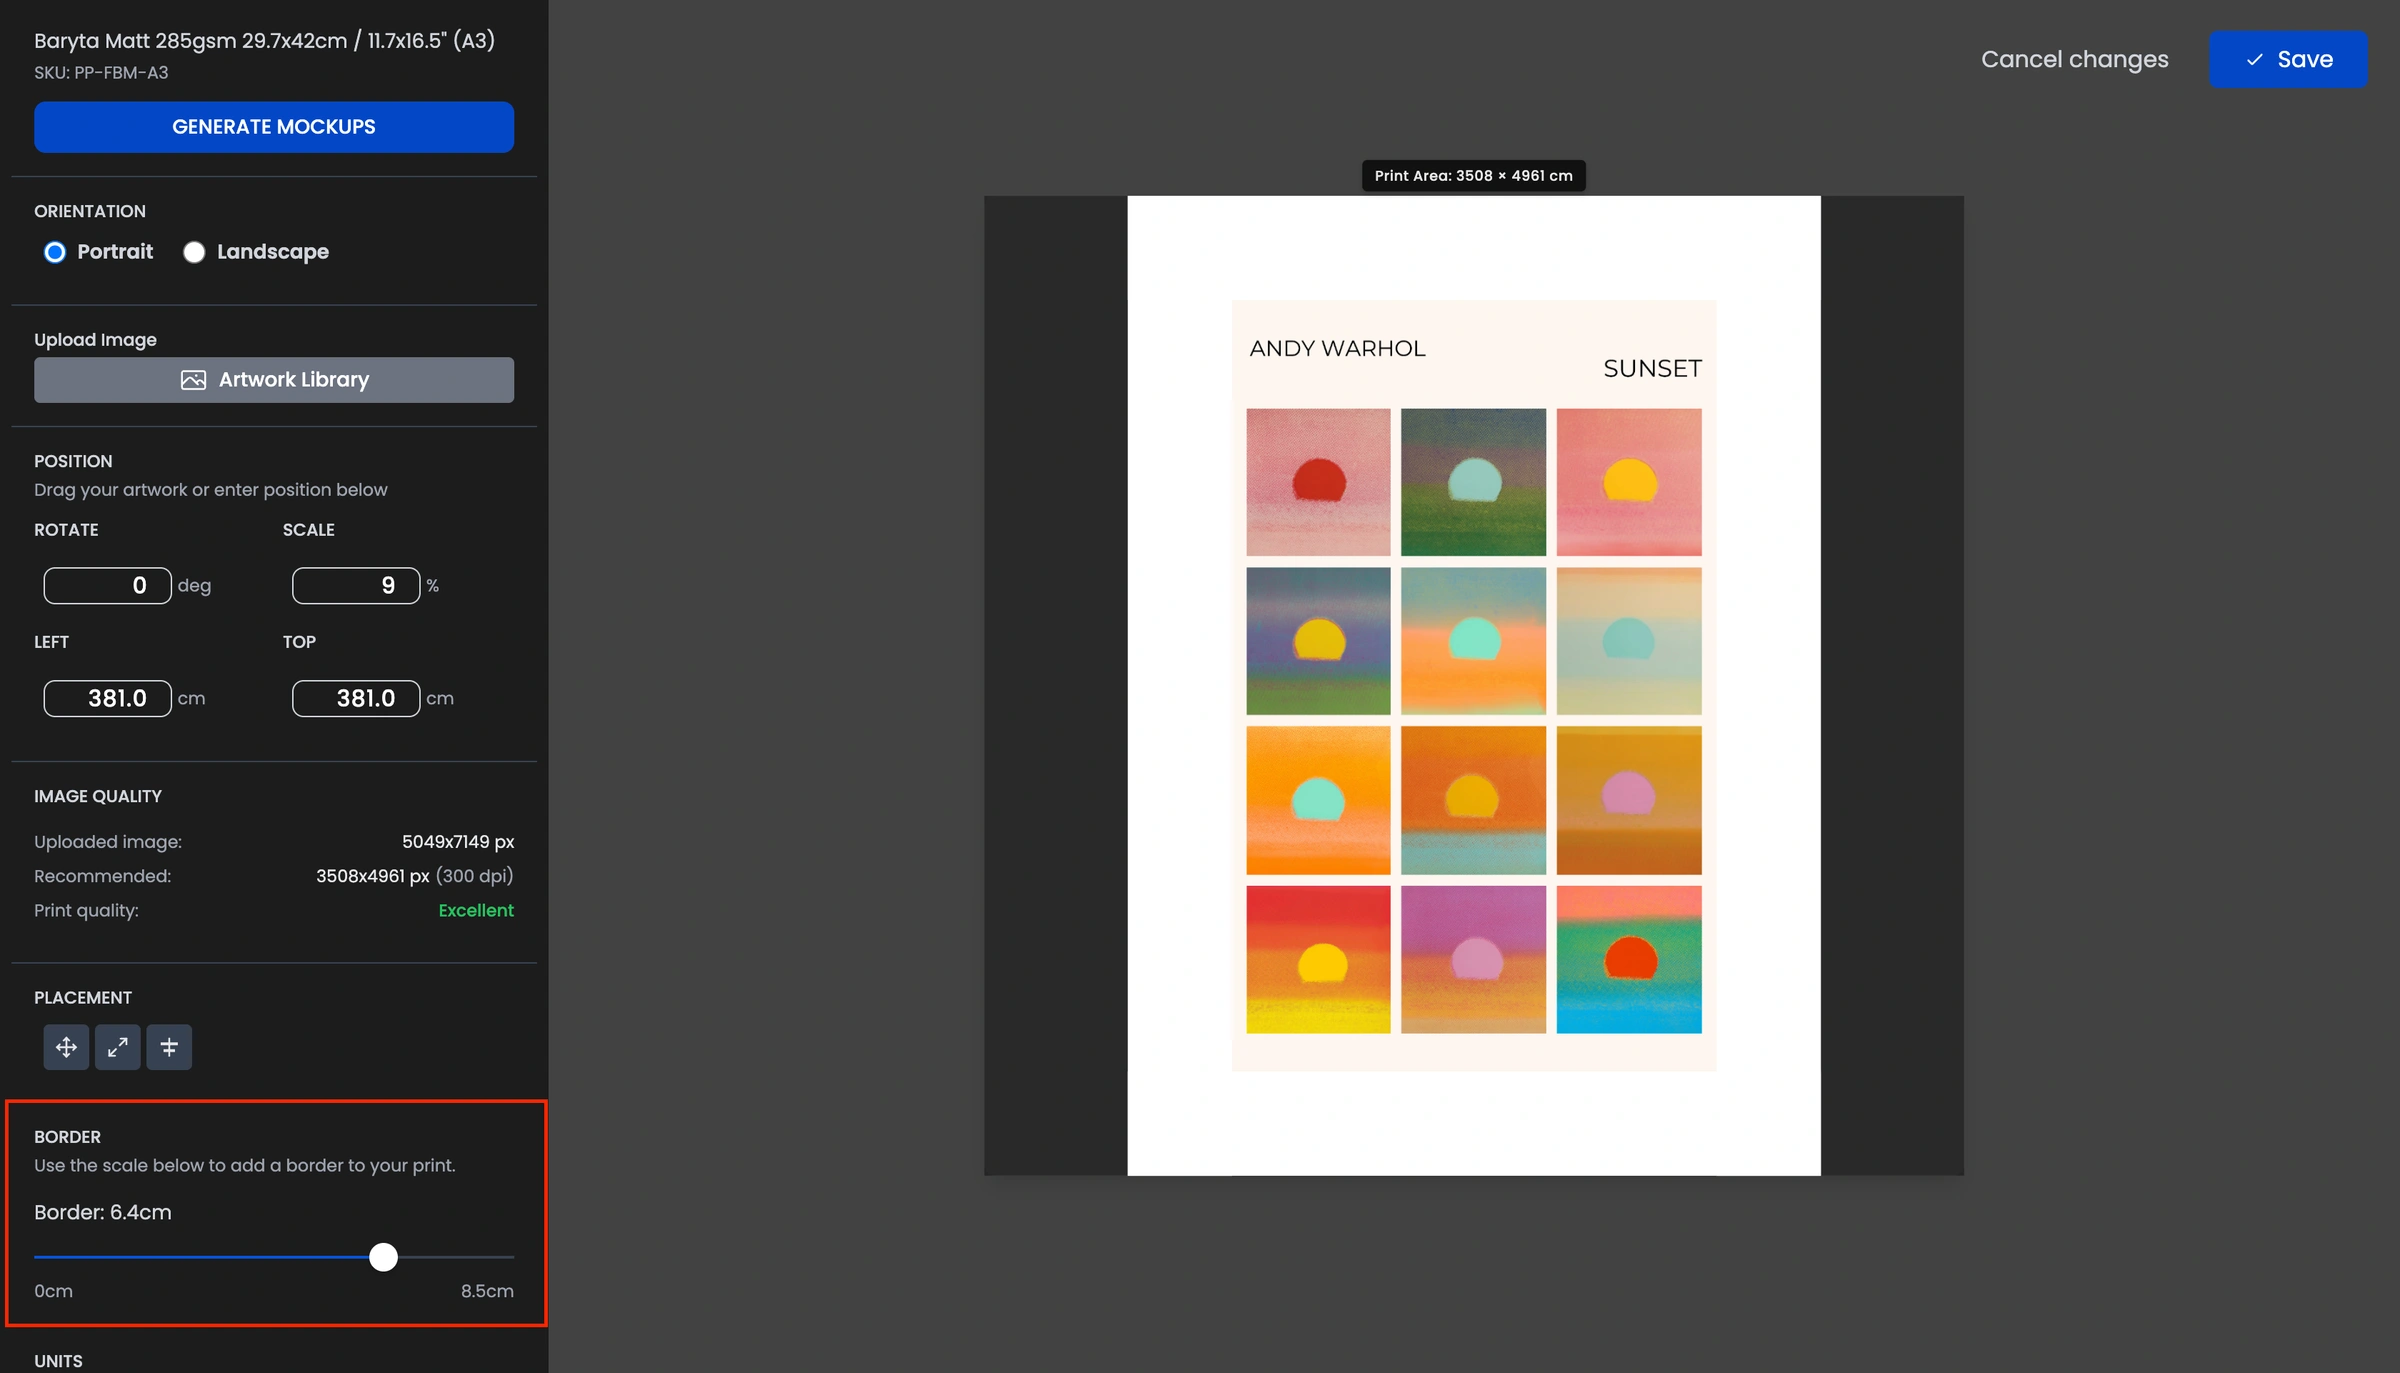
You do not need to be a graphic design expert to add borders. You can manage this directly within our platform:
Edit an existing image: Simply click Edit on any image you have already uploaded to open our image editor. From here, you can apply and adjust borders to your liking.
Create a template: You can also create a specific template and use our dedicated border tools to ensure every image you upload follows the same style.
Preparing Files Manually
If you prefer to use your own software like Photoshop or Canva, the best method is to include the white border within your file before you upload it to Papello.
Our border tool is designed to be flexible. It allows you to upload borderless images and adjust them on the fly, or you can upload your pre-prepared file with the borders already in place.
Summary Tips
For a decorative look: Use the Papello image editor to add a wide white border that will be visible to the customer.
Check the preview: Always use our mockup tool to see exactly how your border will look on the final physical product.