Templates allow you to create print-ready artwork files that are perfectly sized and positioned for a specific Papello product.
They are especially useful when your original artwork doesn’t naturally match the shape of the product — for example, square artwork on a mug, where the print area is long and rectangular.
If you’re ever unsure whether your artwork will fit a product correctly, create a template first.
What Is a Template?
A template is a saved layout for a specific product variation.
When you create a template:
- The canvas is automatically set to the exact print size required
- Your artwork is positioned correctly for production
- A print-ready artwork file is generated and saved to your Artwork Library
- That file can then be reused for listings and orders
Example: Square Artwork on a Mug
A mug print file is not square – it’s a long rectangular shape that wraps around the mug.
If you upload a square image directly, it may:
- Be cropped
- Leave blank areas
- Not wrap correctly
By creating a template using the mug product:
- You can position the square artwork correctly
- Ensure it fills the print area
- Save a file that is ready for printing every time
Step 1: Go to the Templates Page
From the Papello dashboard, go to:
https://dash.papello.com/dashboard/templates
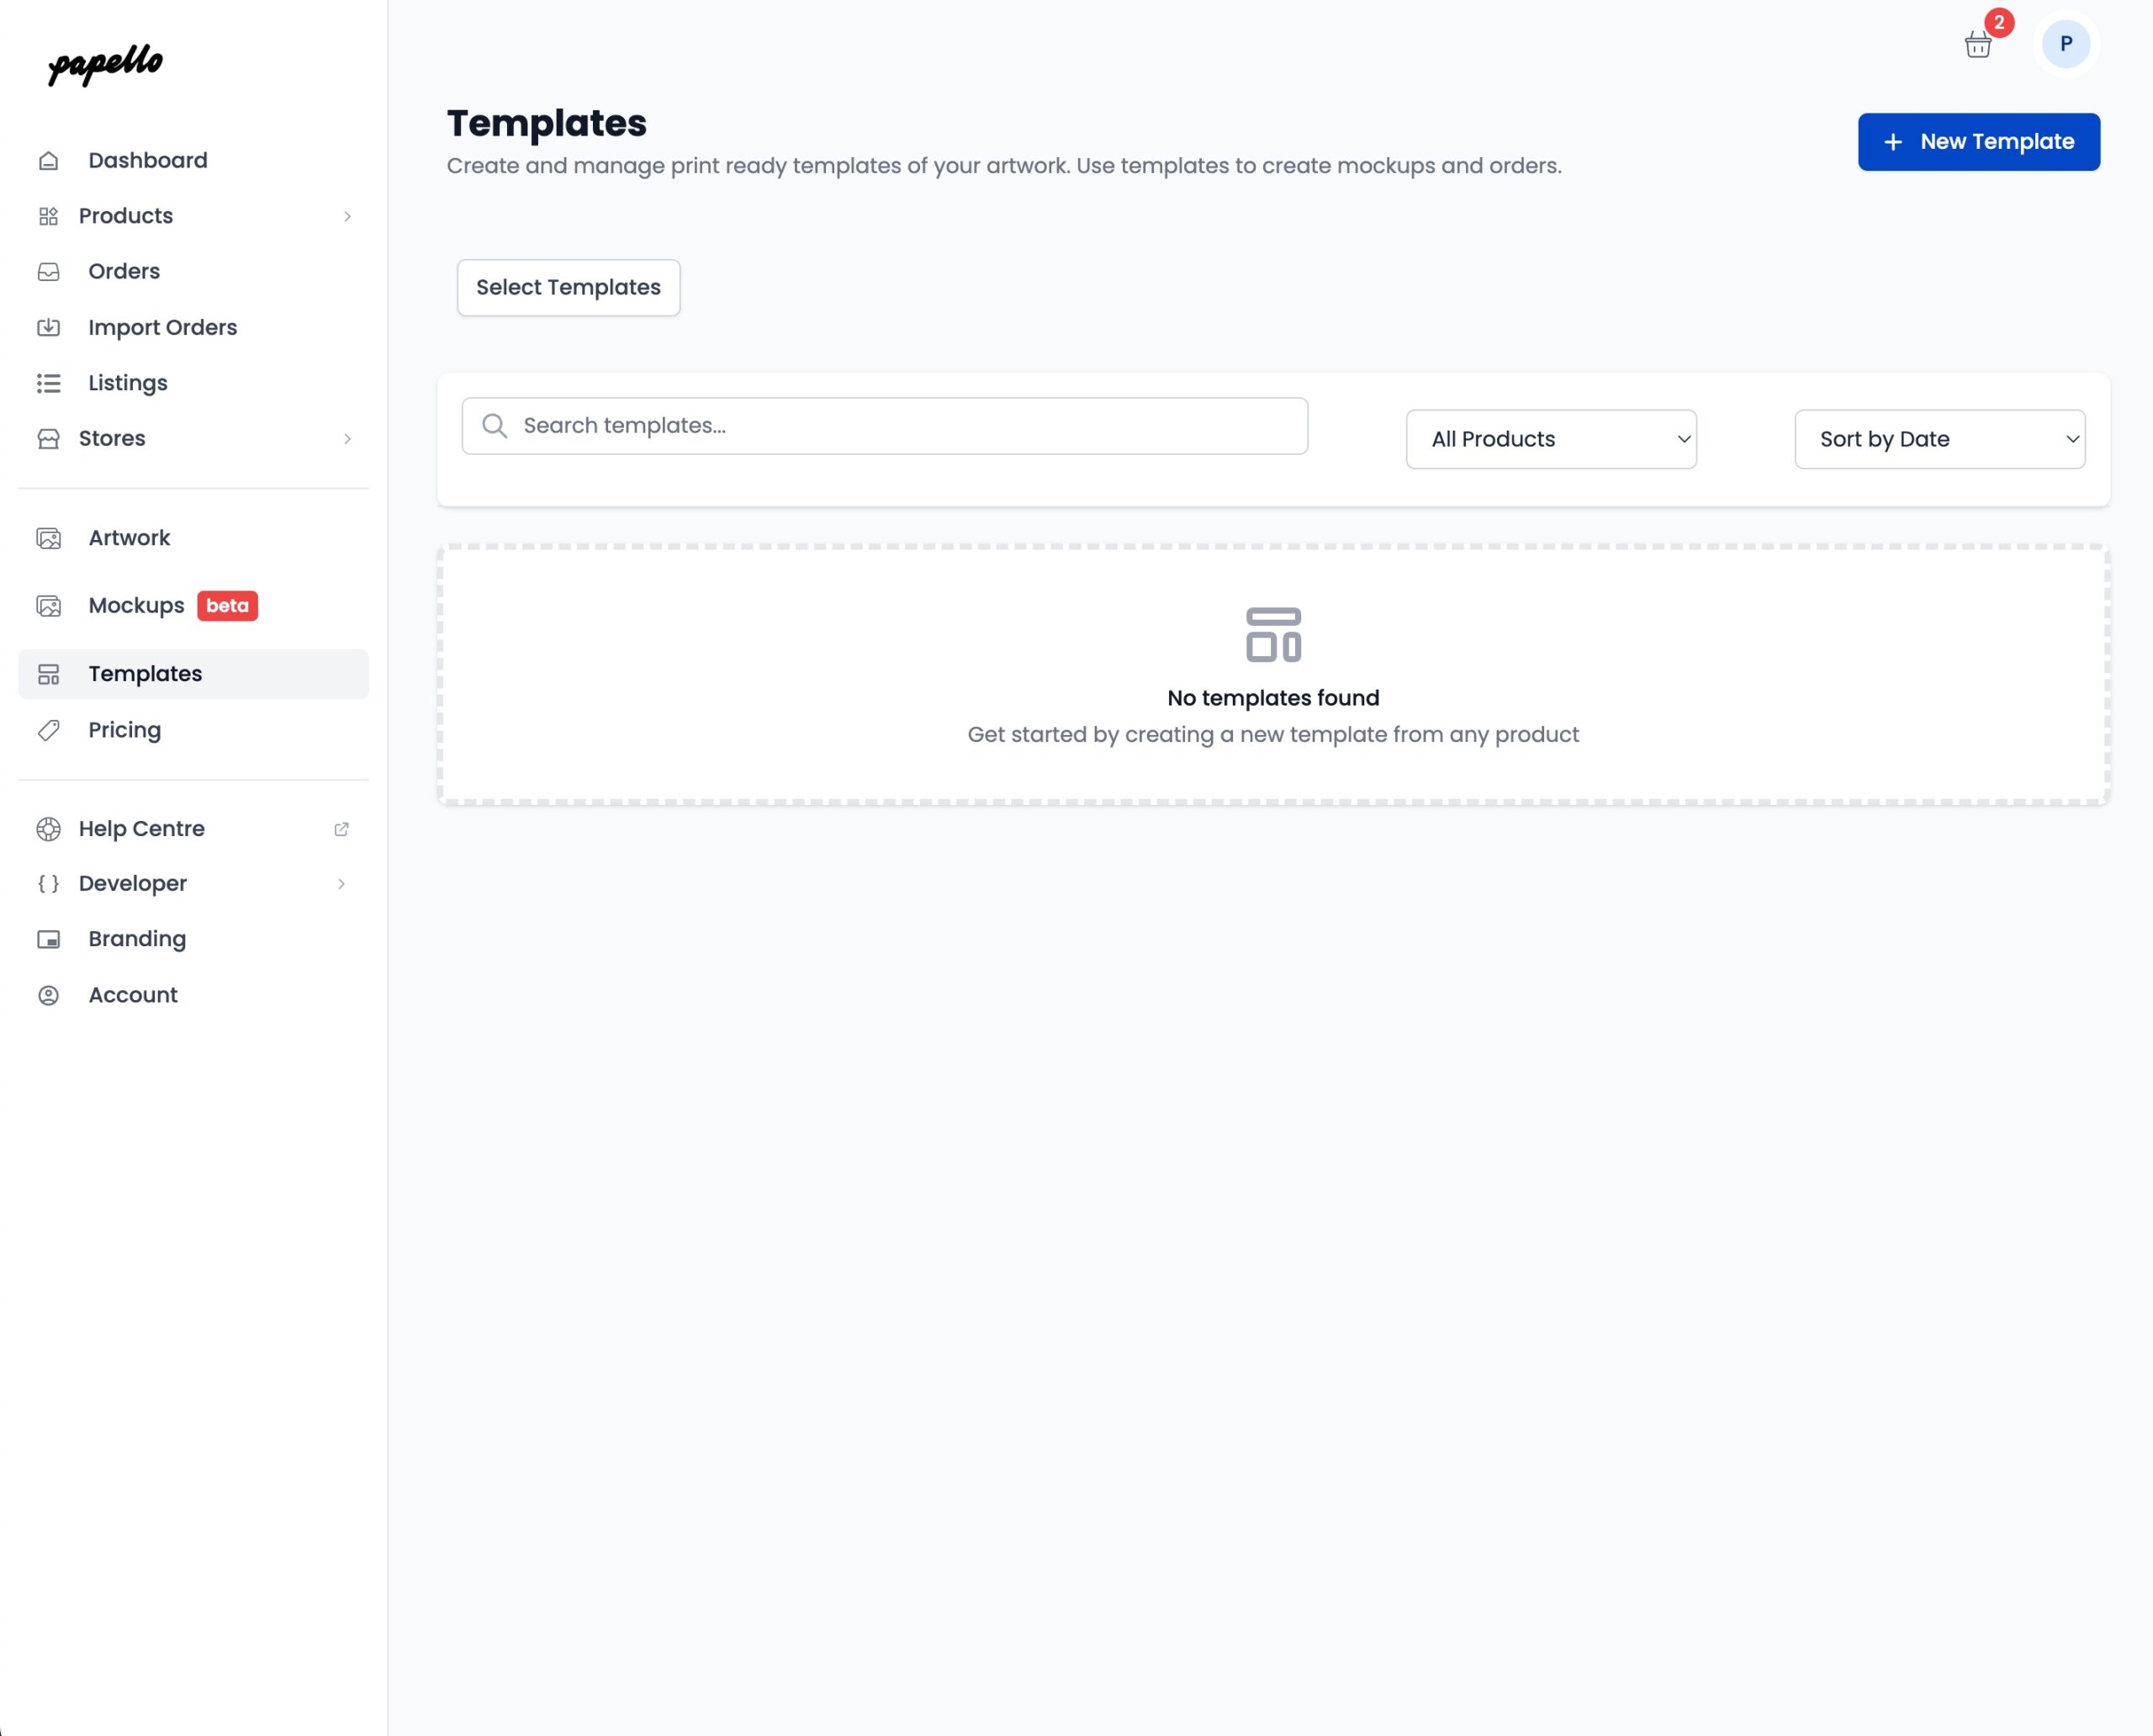
Step 2: Create a New Template
Click New Template.
Step 3: Select a Product Variation
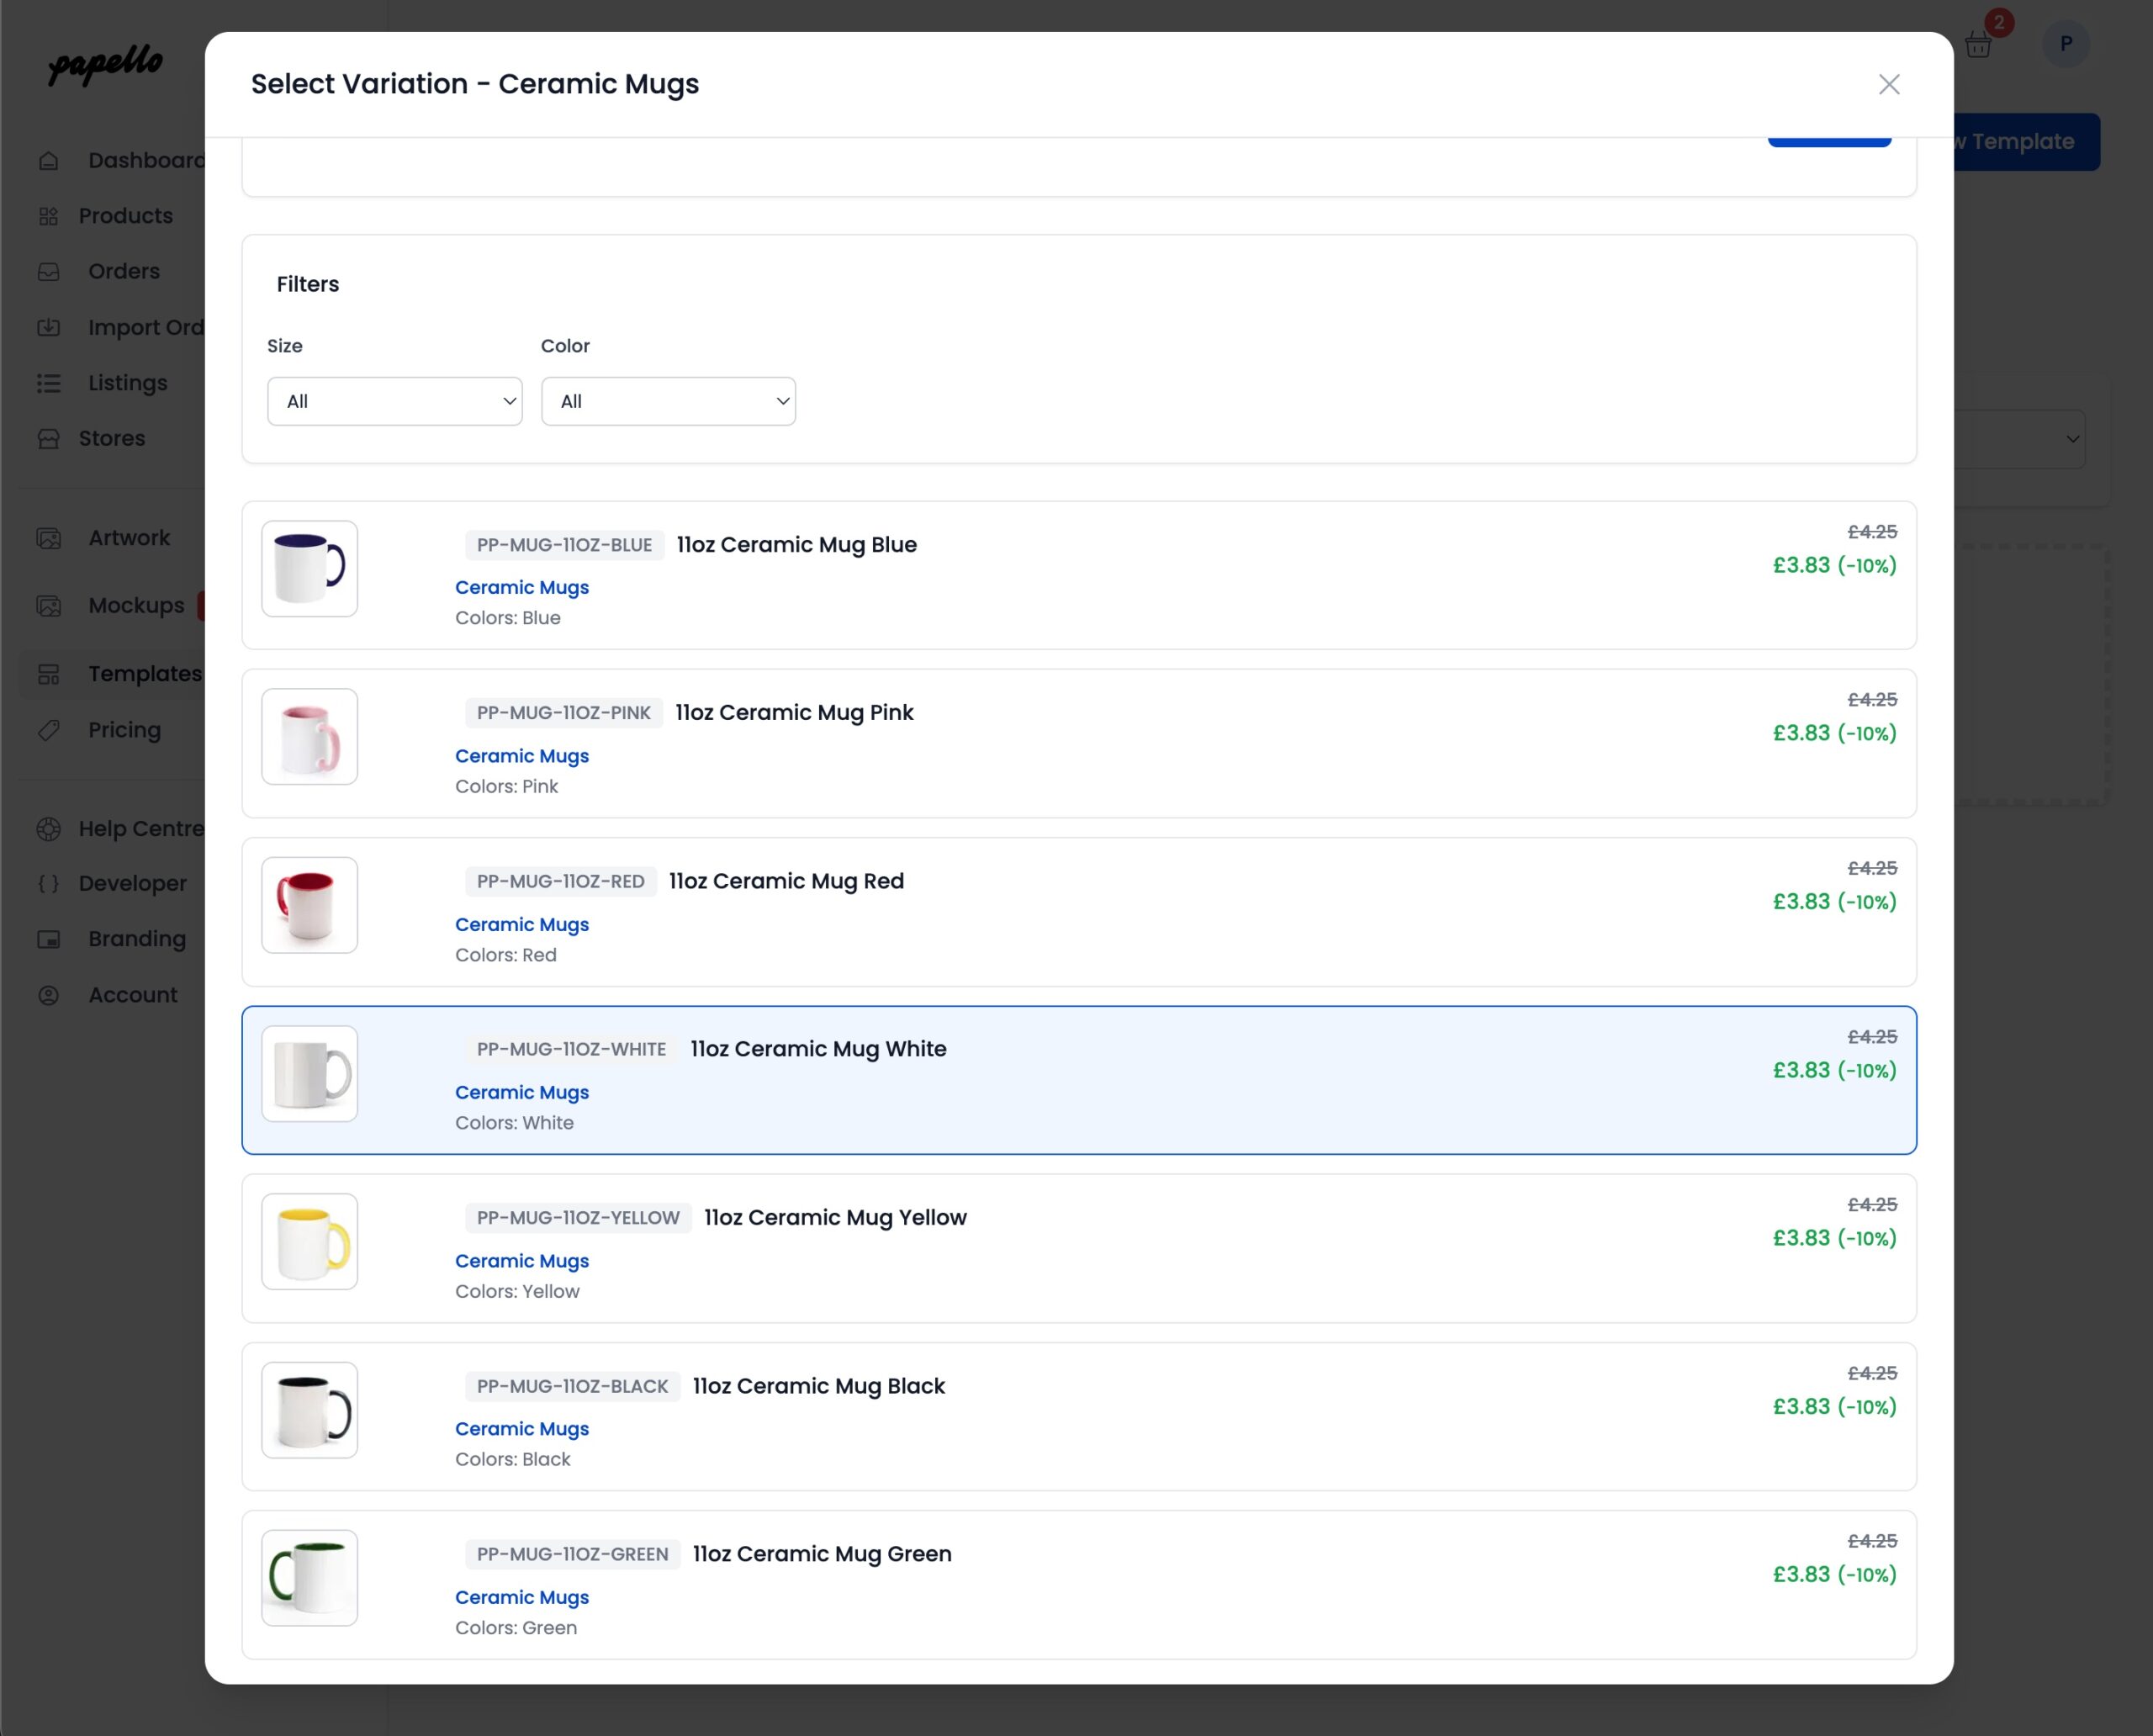
Find and select the product variation you want to create a template for.
In this example, select a mug product variation.
This ensures the template is created at the exact size required for that product’s print file.
Step 4: Add Your Artwork
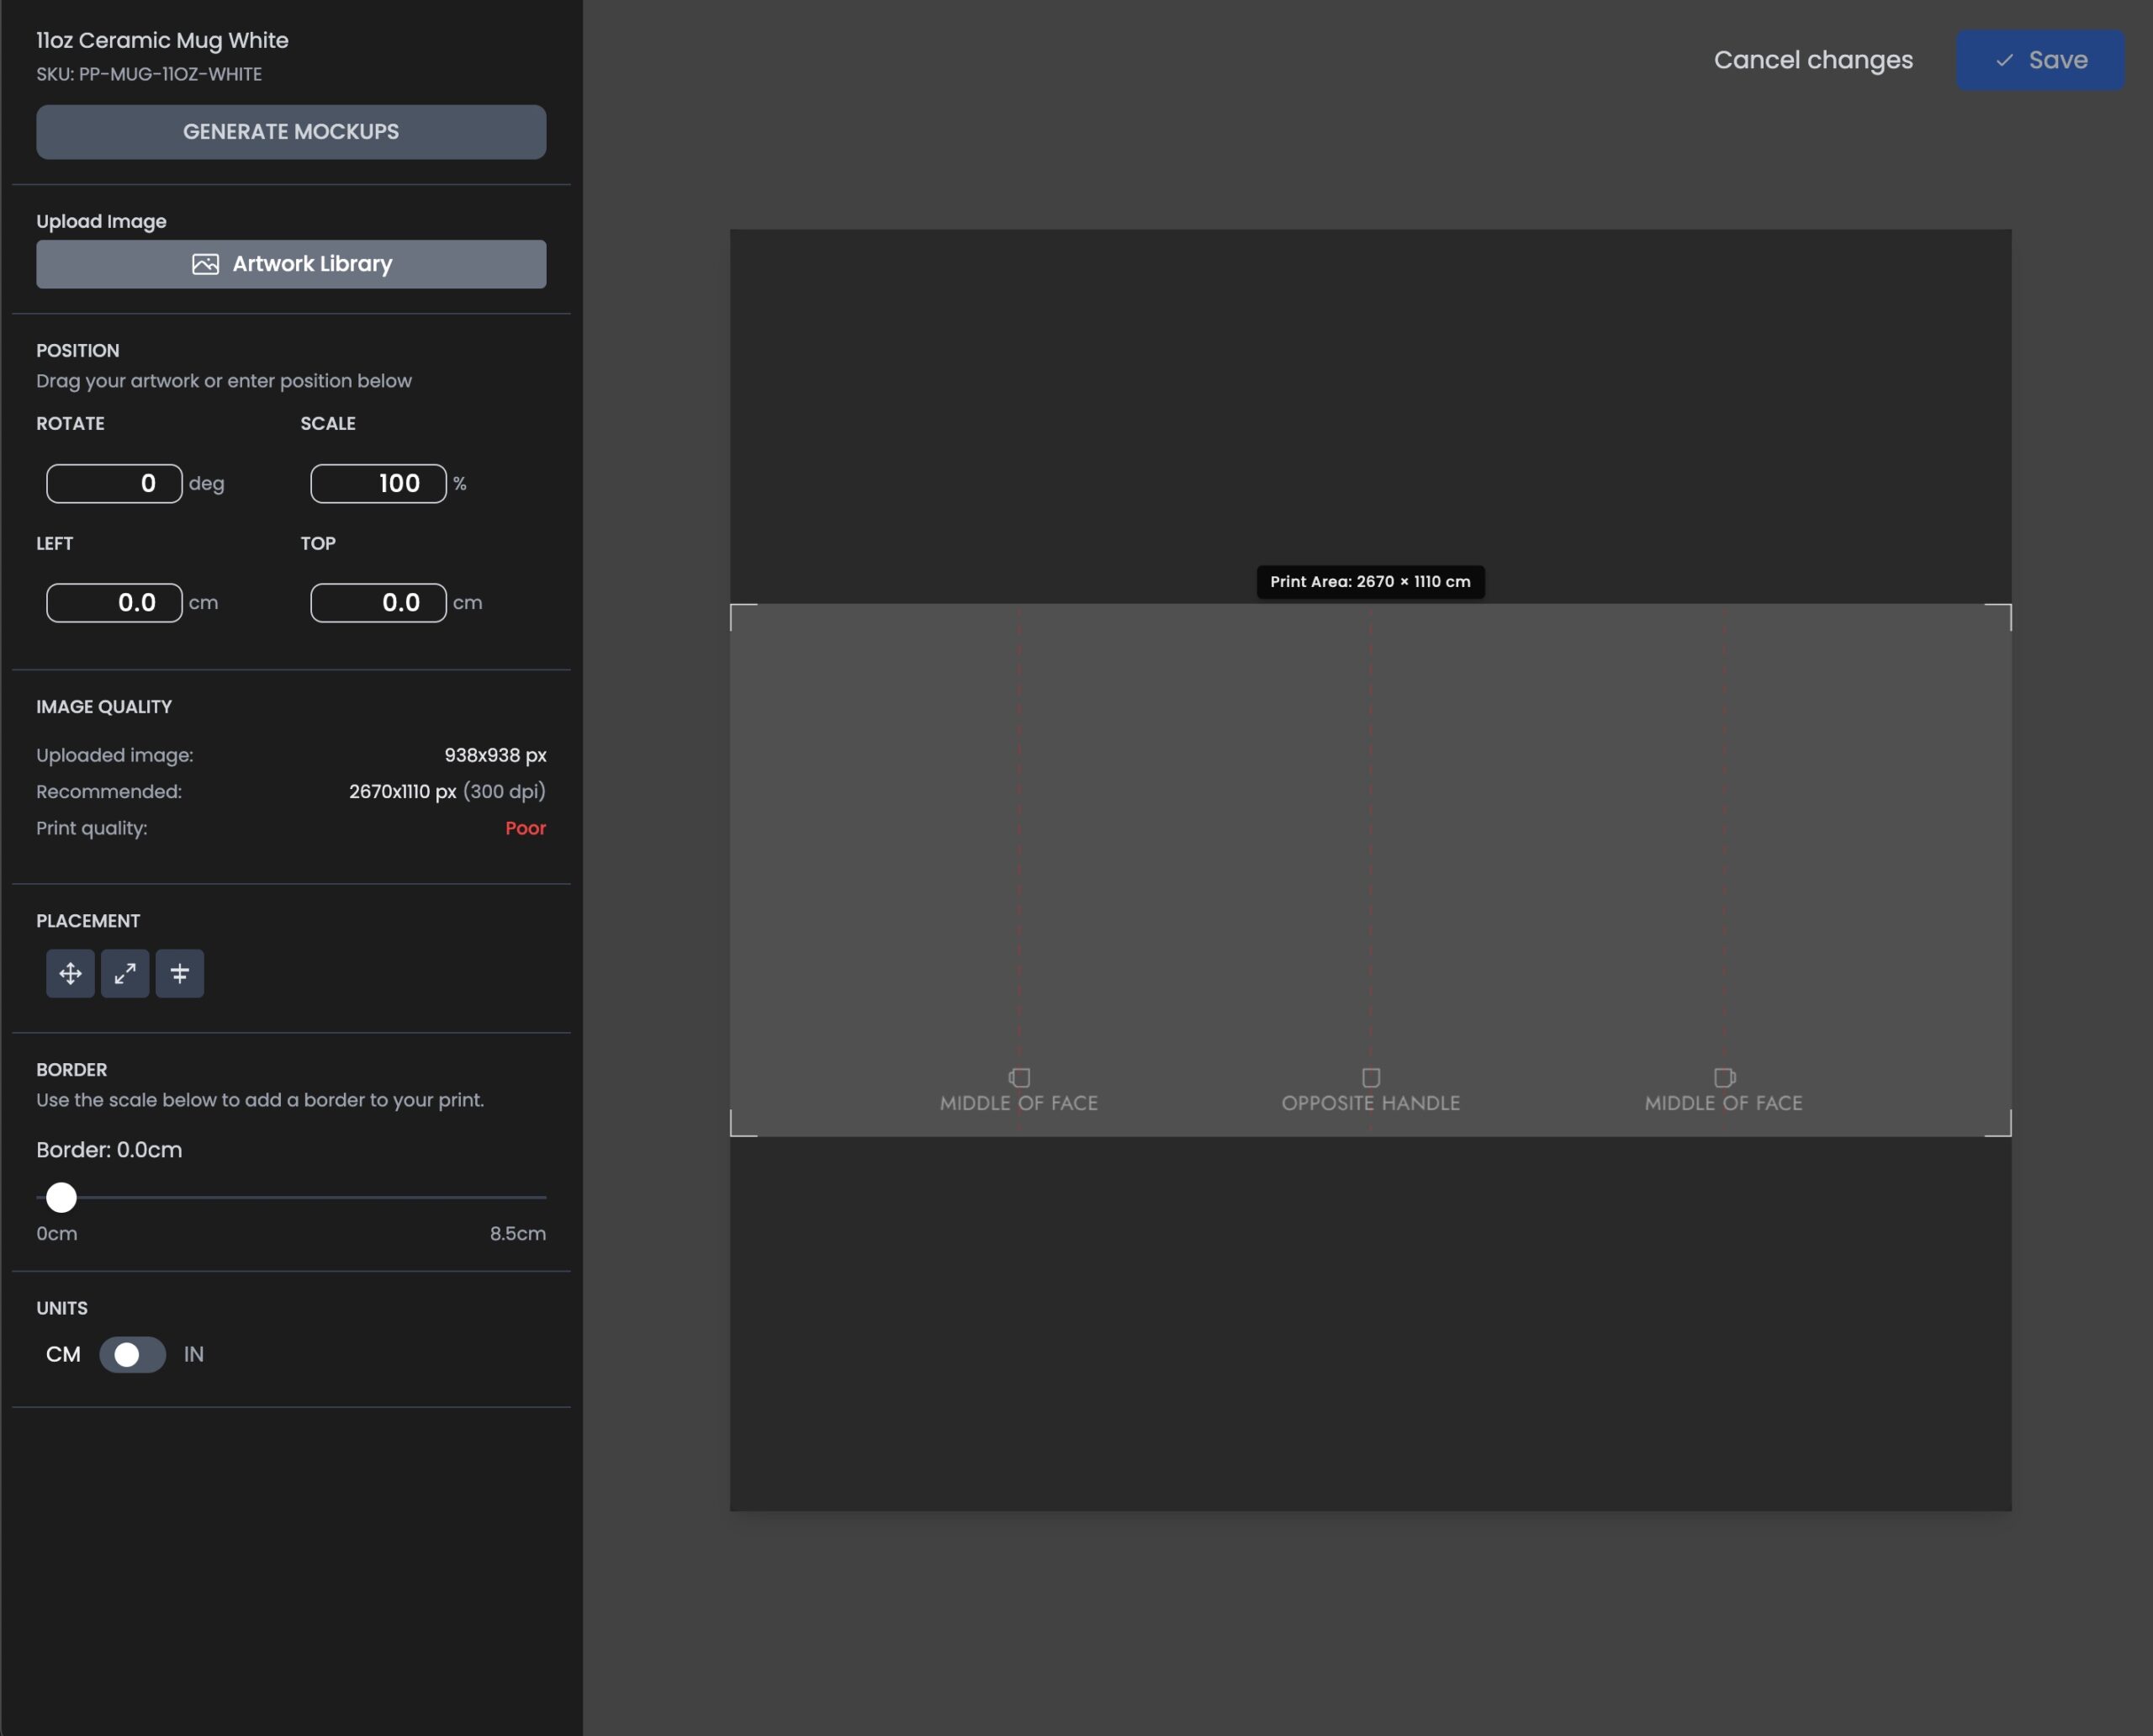
The editor will now load with:
- A canvas set to the mug’s print dimensions
Add your square artwork to the canvas.
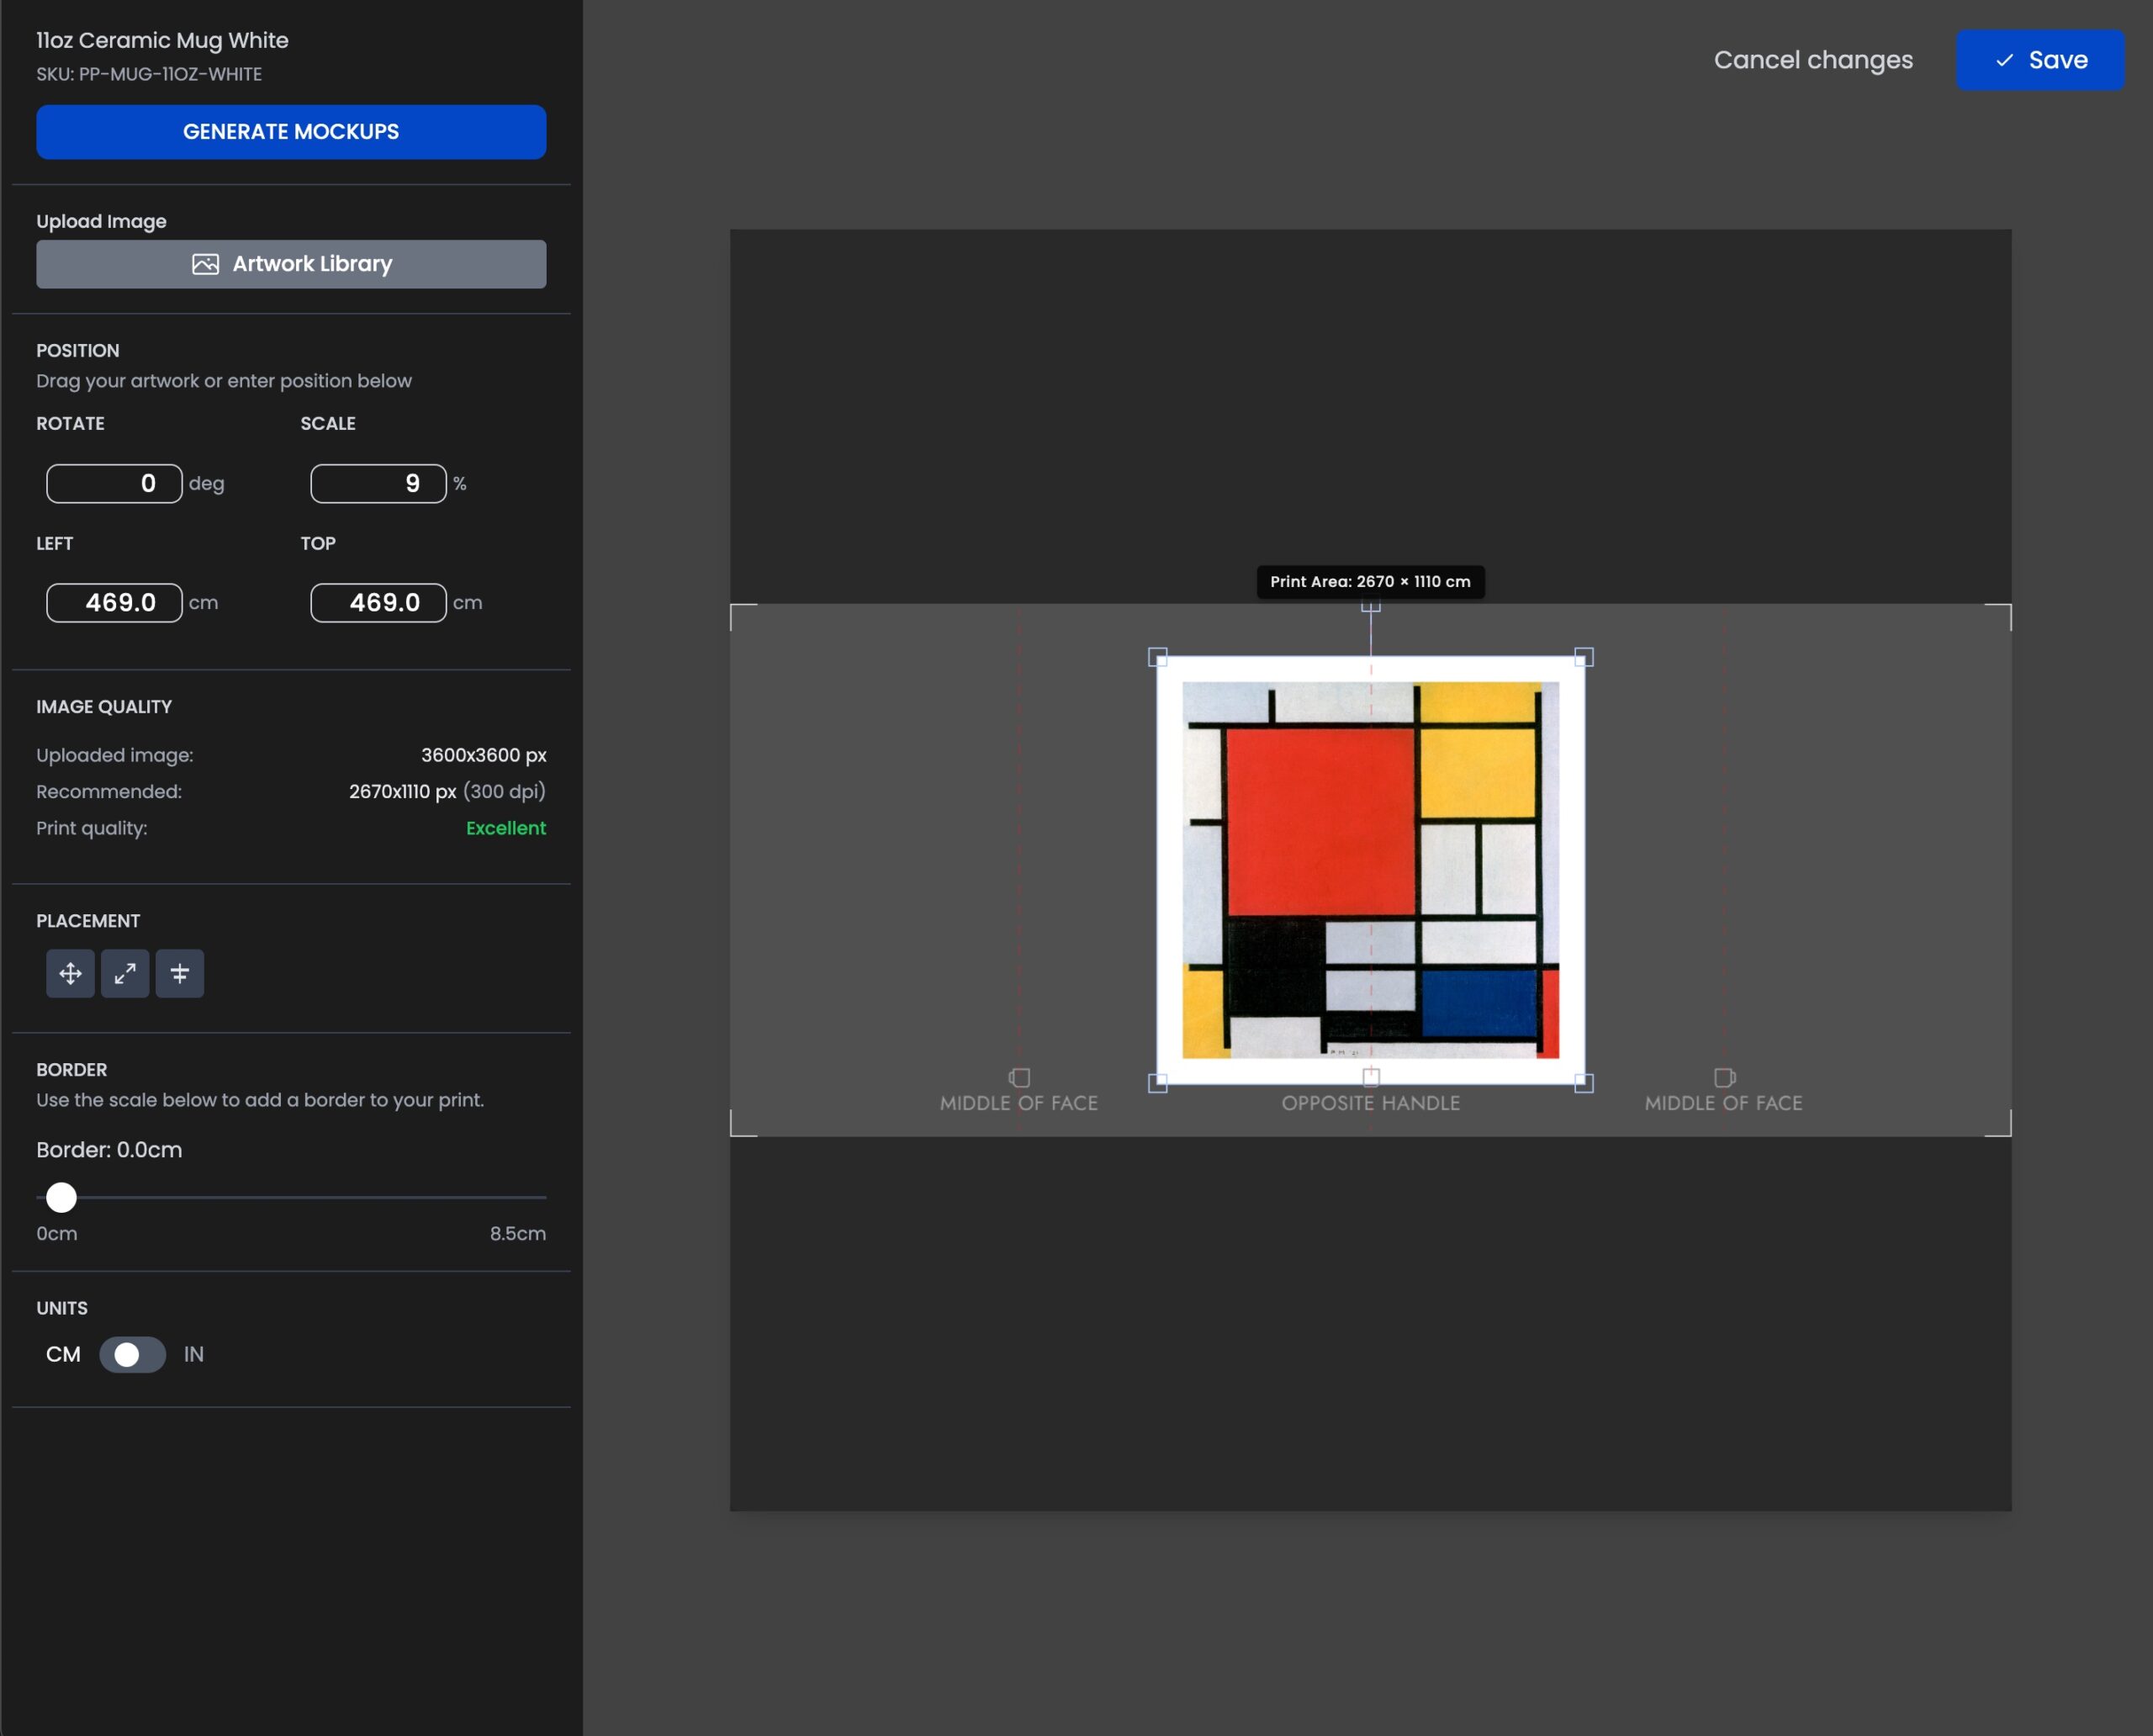
Step 5: Position the Artwork
Use the move, resize, and alignment tools to position your artwork correctly.
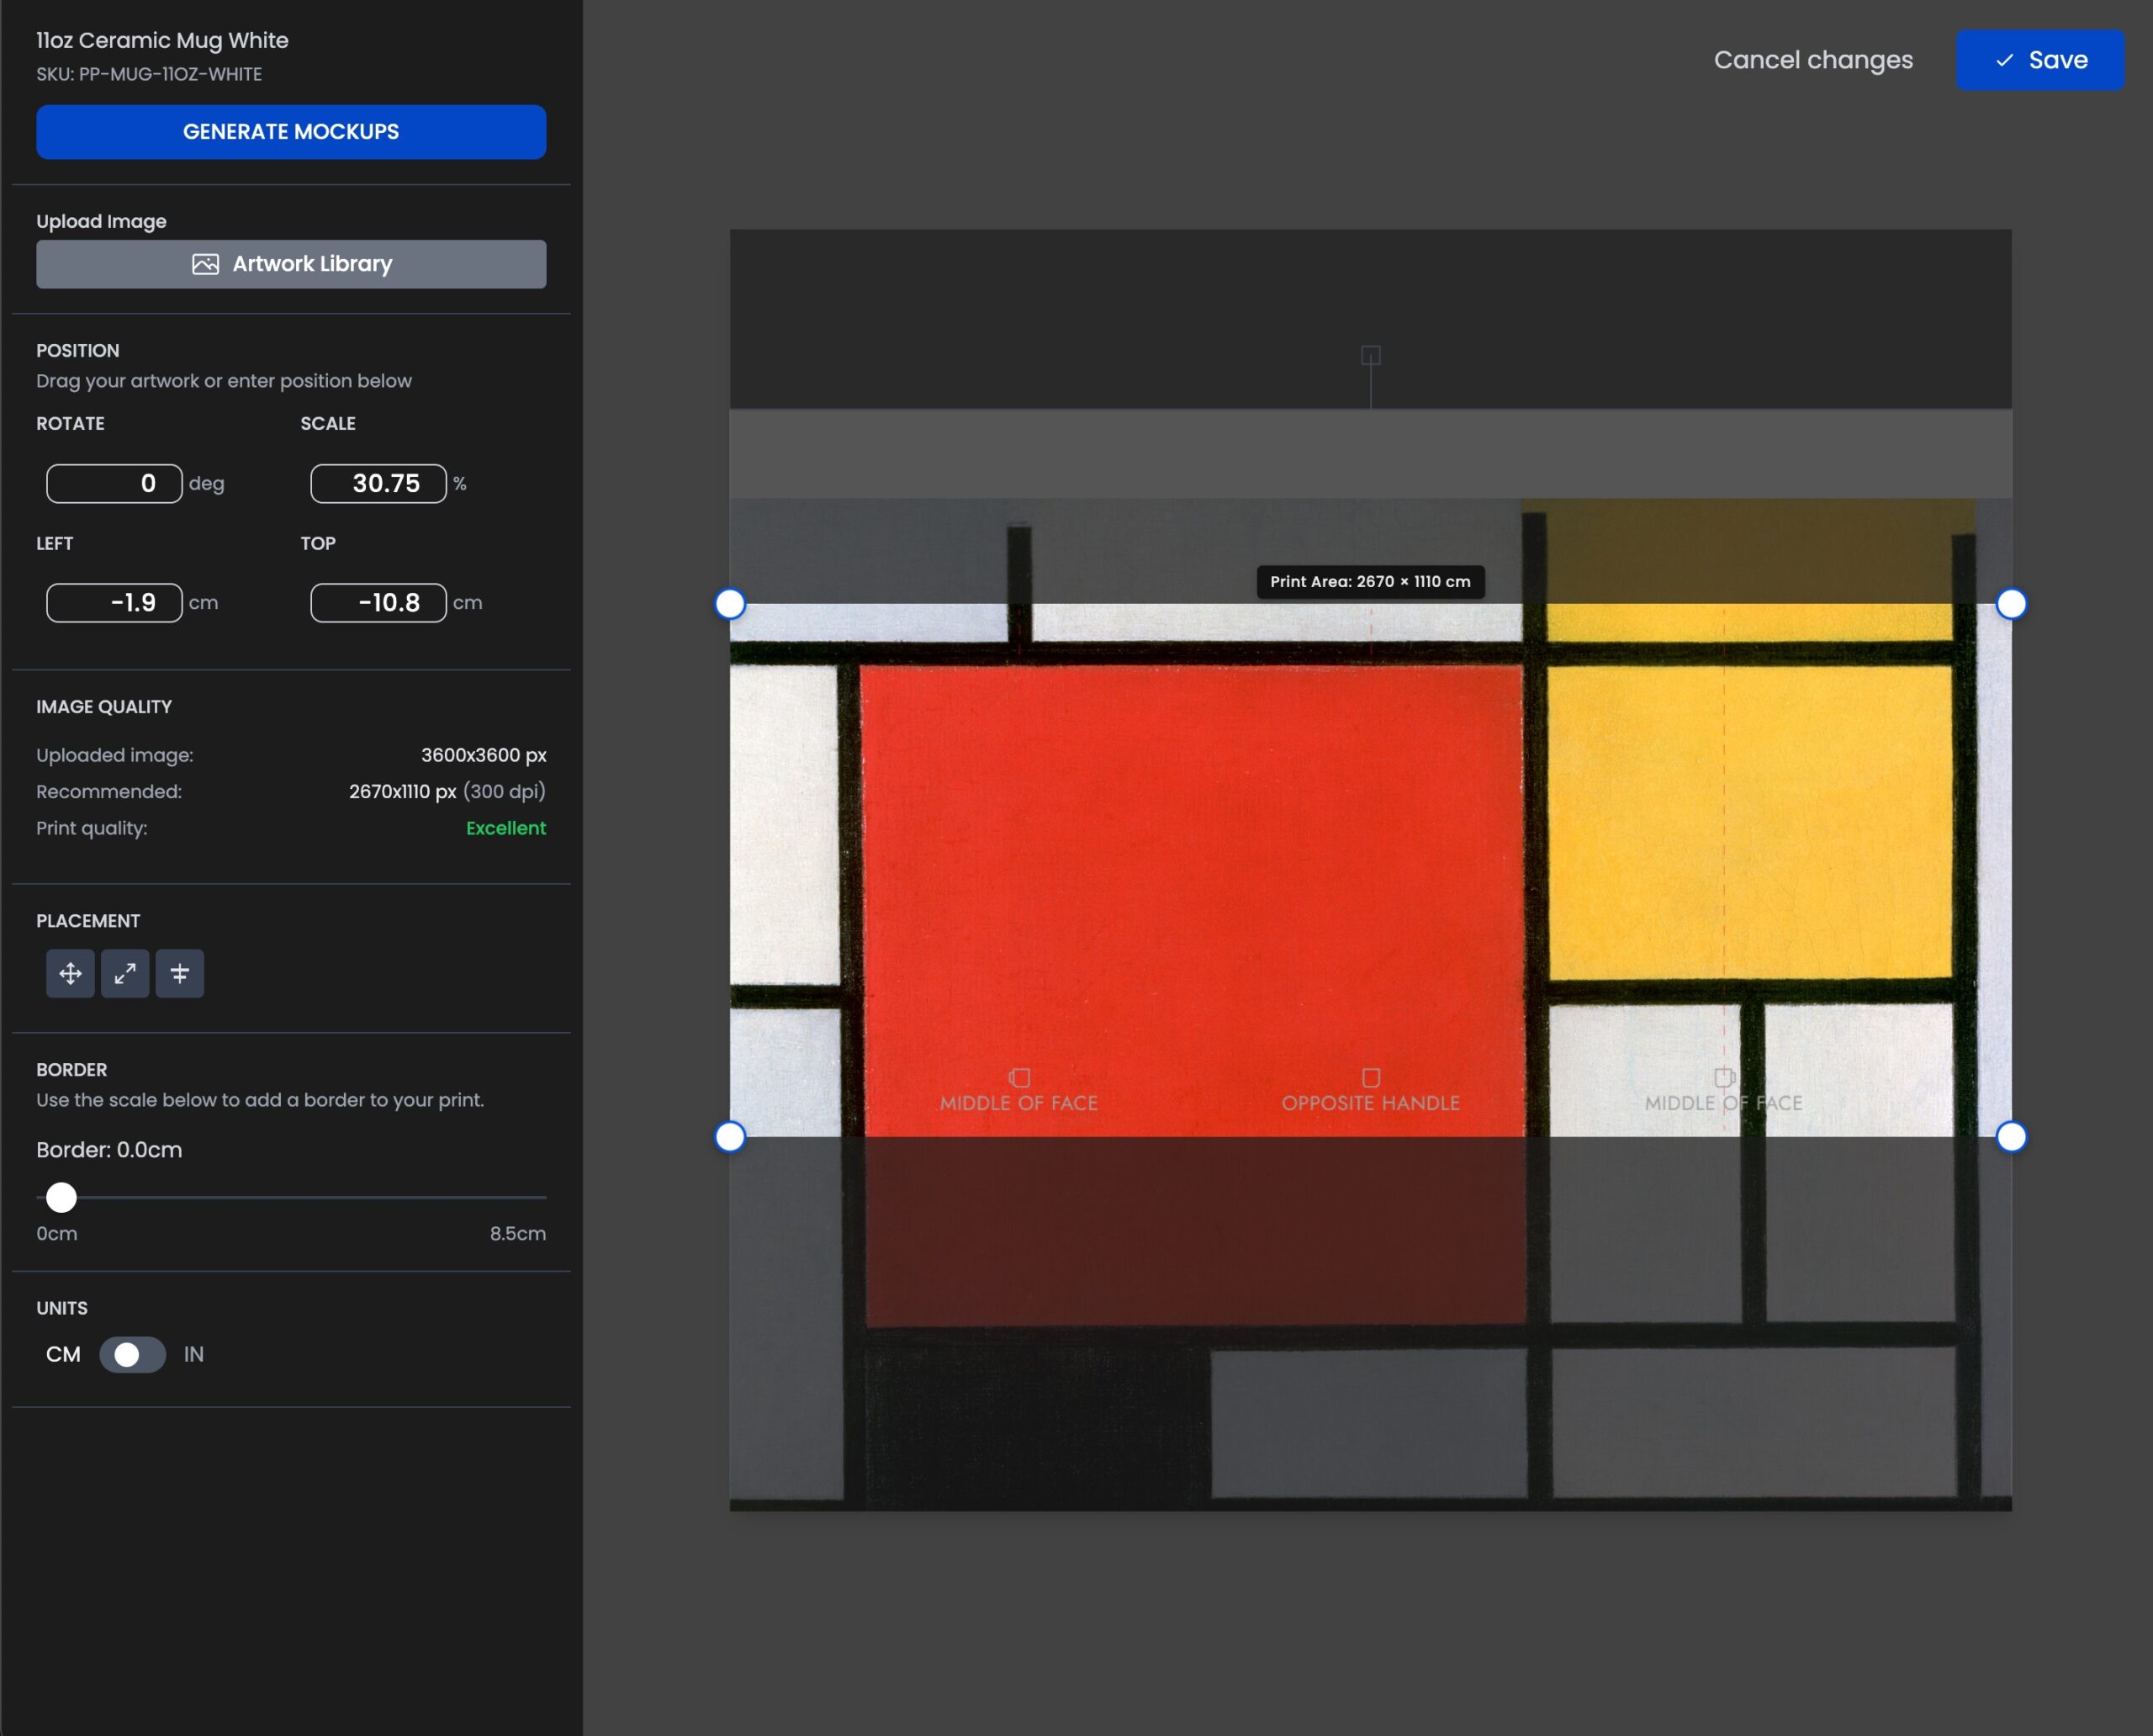
For mugs, this usually means:
- Stretching or positioning the artwork so it covers the full canvas
- Ensuring important elements are not cut off at the edges
Step 6: Generate Mockups to Check Placement
At any point, you can generate mockups to preview how the product will look.
You can:
- Generate mockups
- Adjust artwork positioning
- Generate mockups again
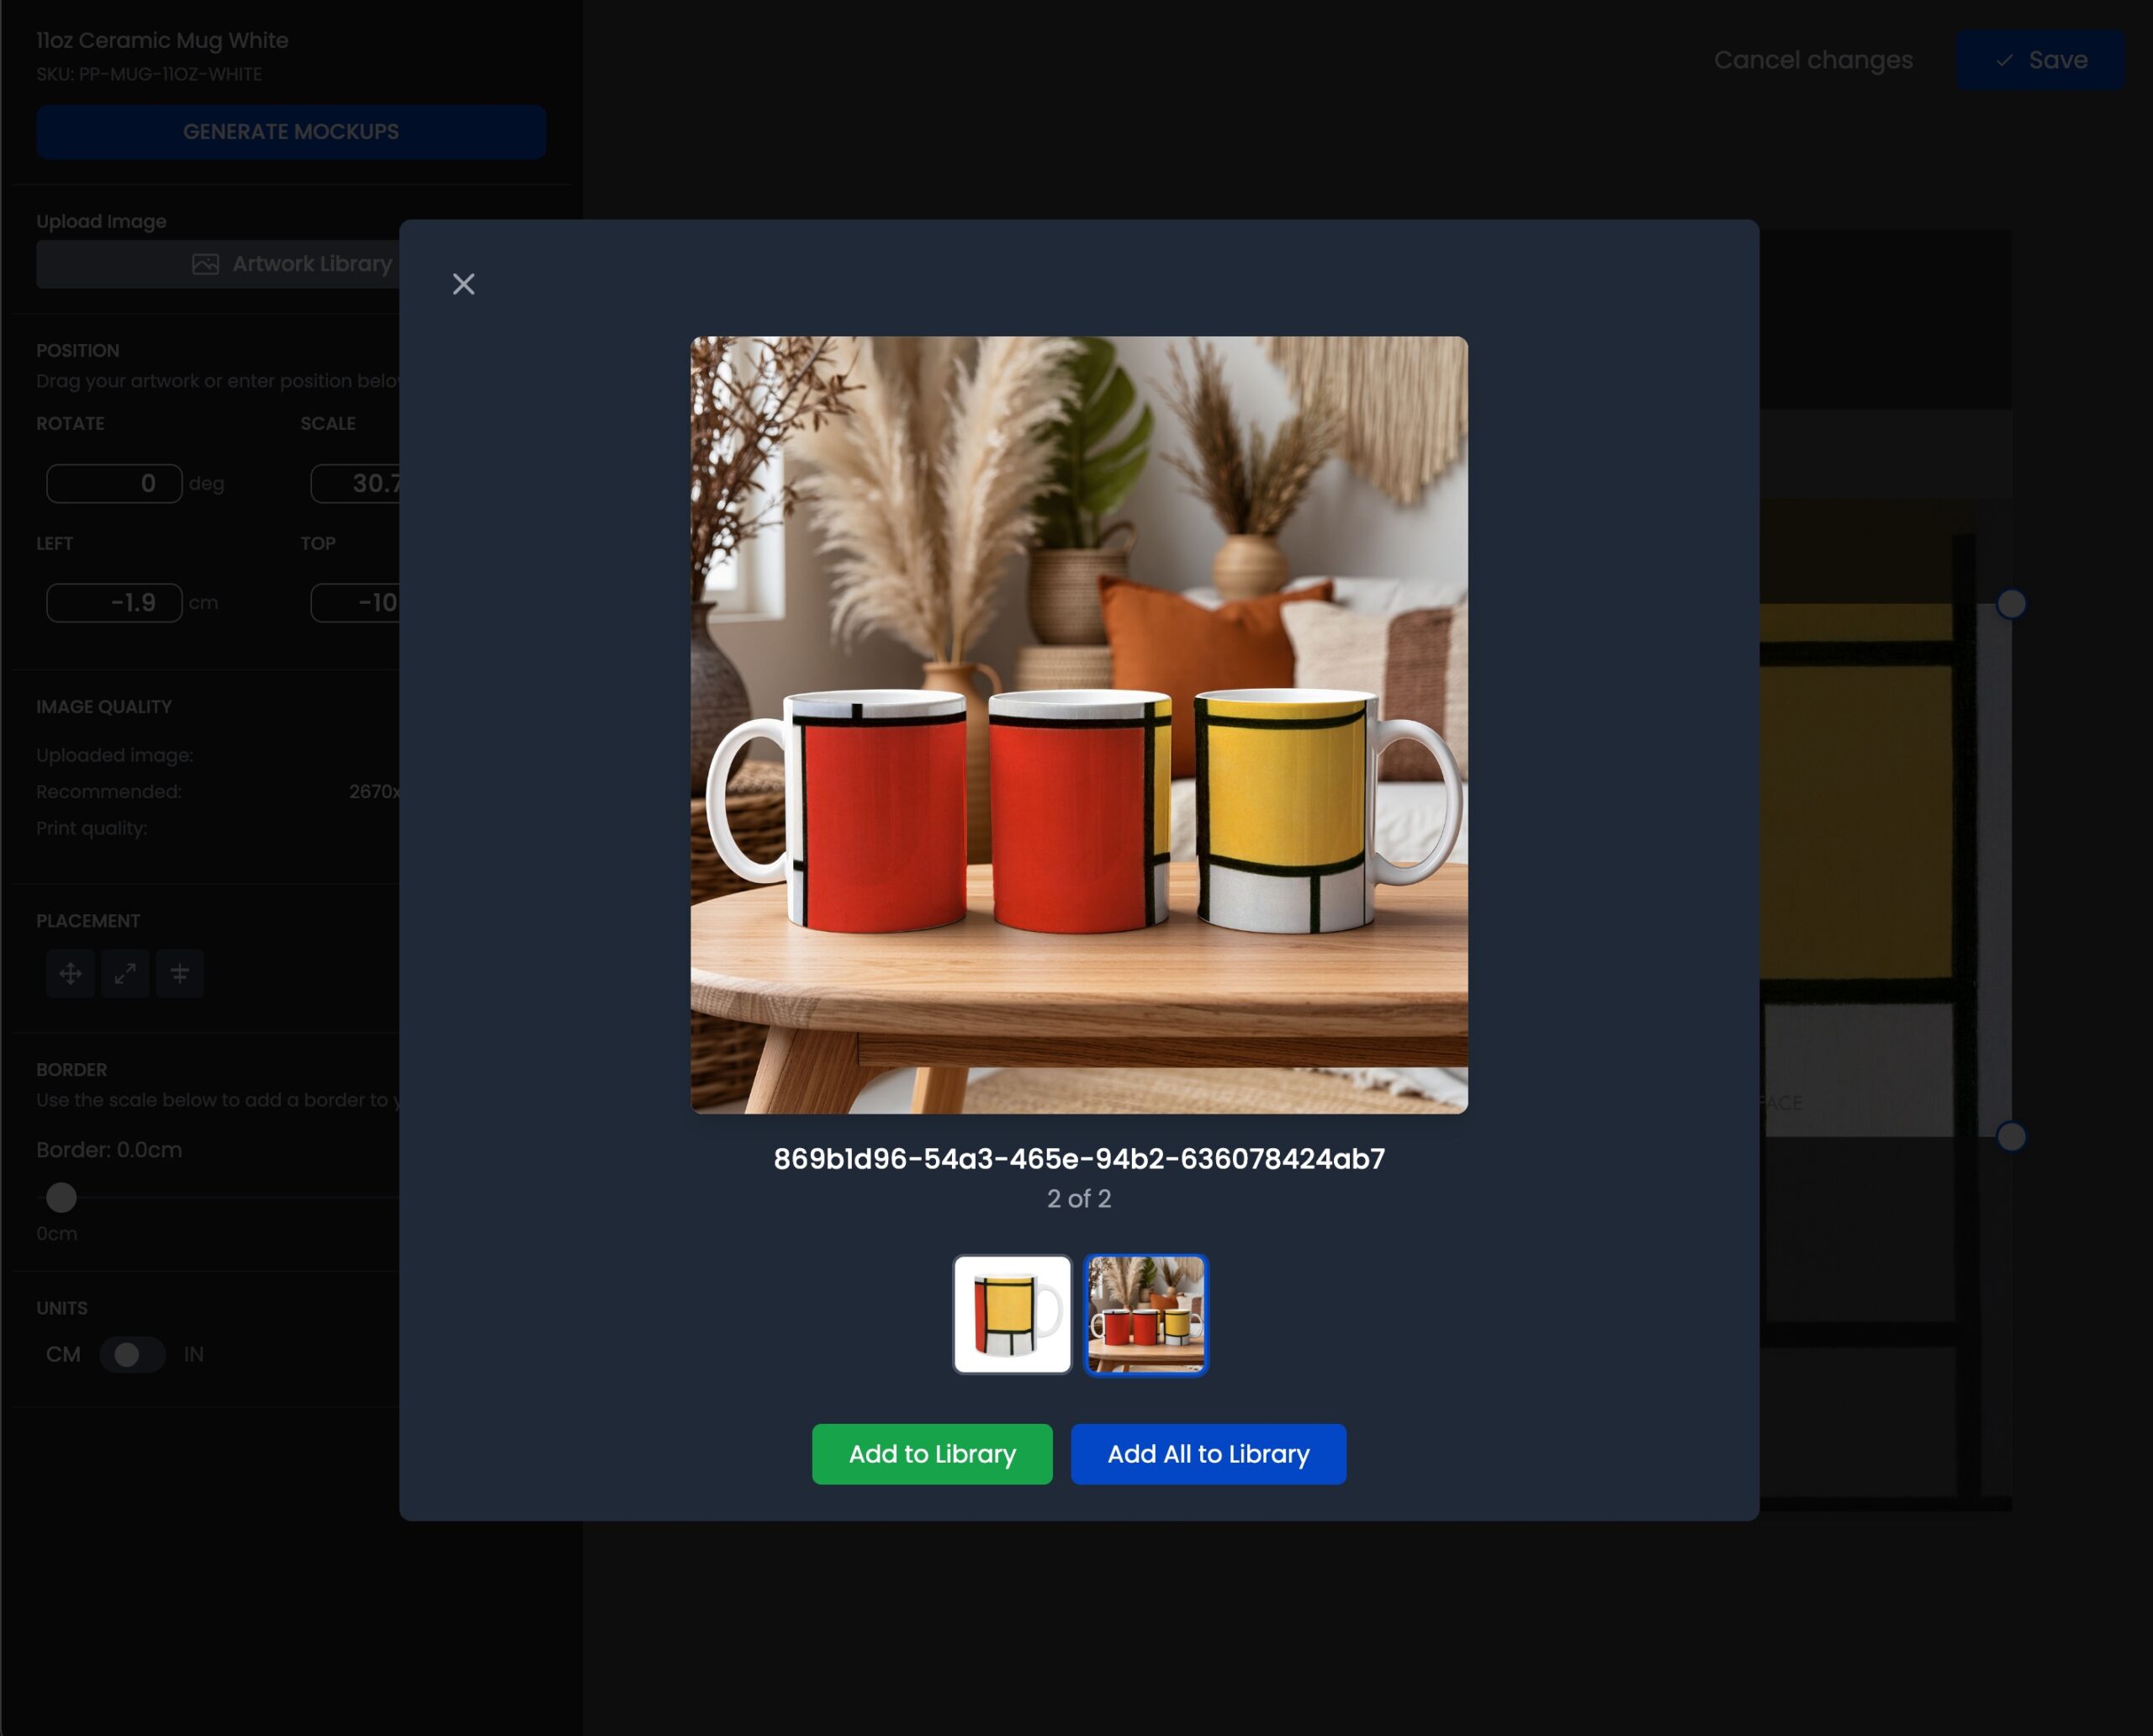
Repeat this as many times as needed until you’re happy with the placement.
Step 7: Save the Template
When you save the template, two things happen:
- The template is saved and visible on your Templates page
- A print-ready artwork file is automatically added to your Artwork Library
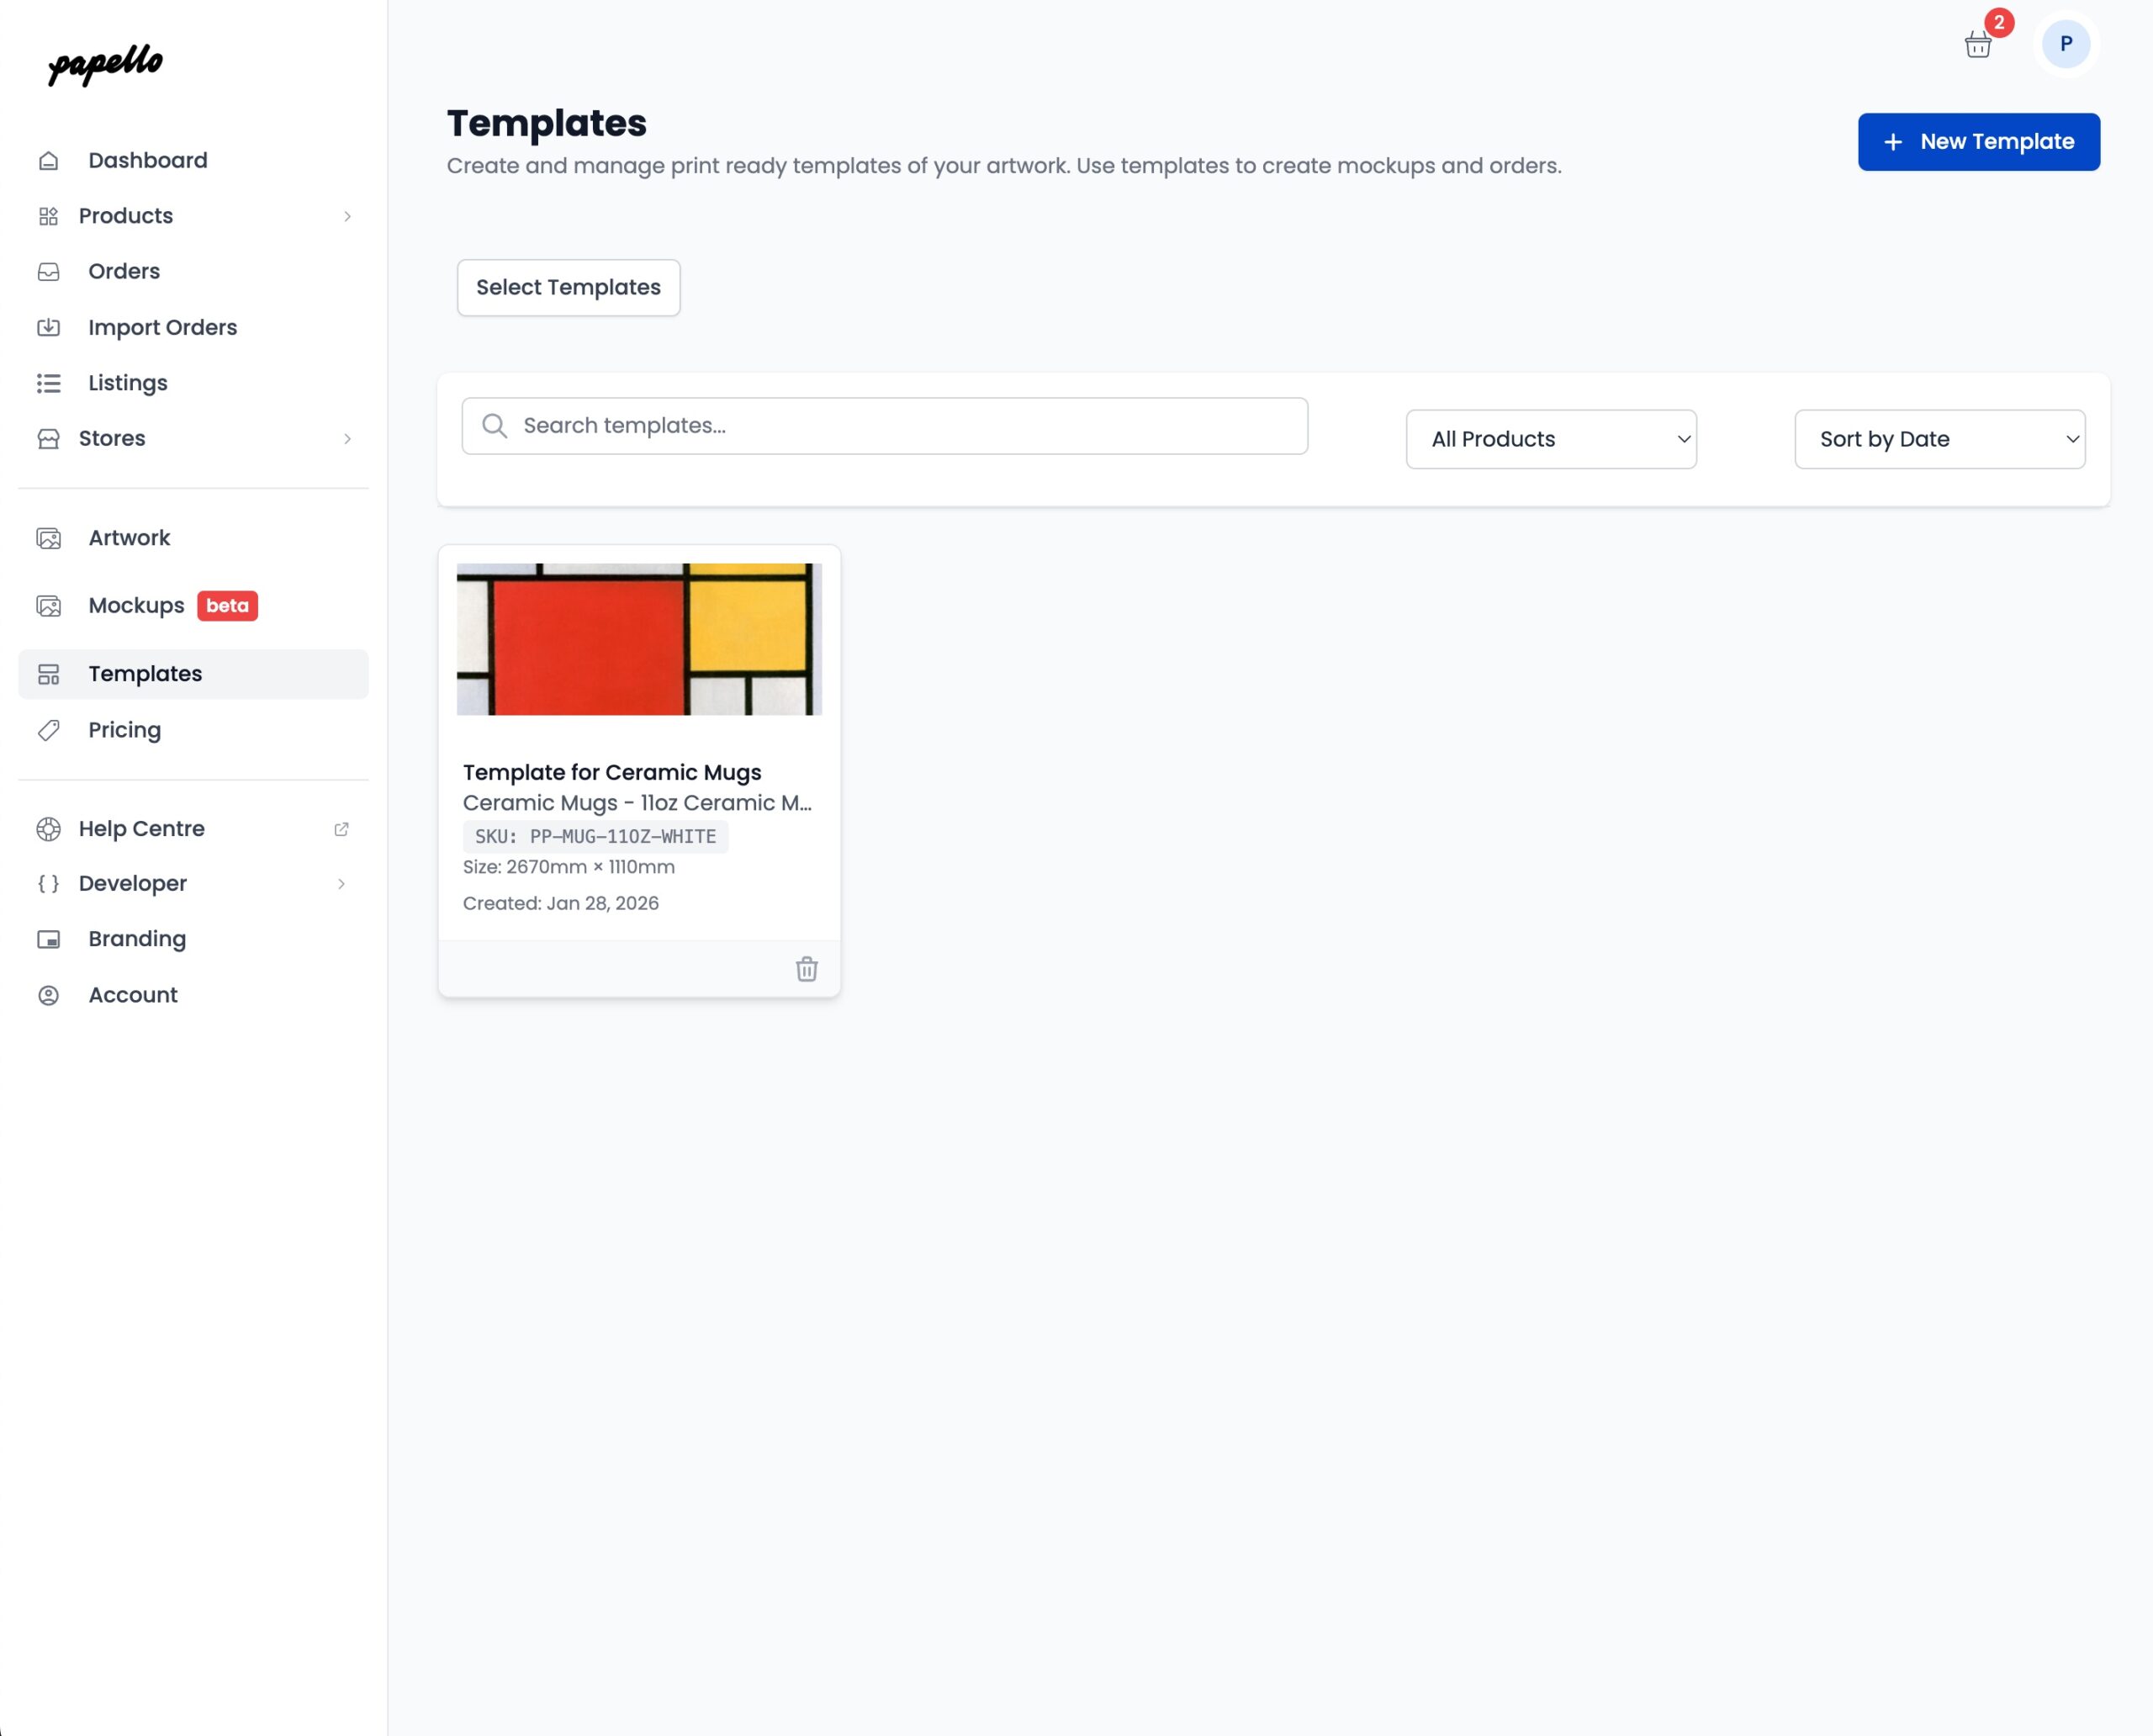
This artwork file is:
- Correctly sized
- Correctly positioned
- Ready for production
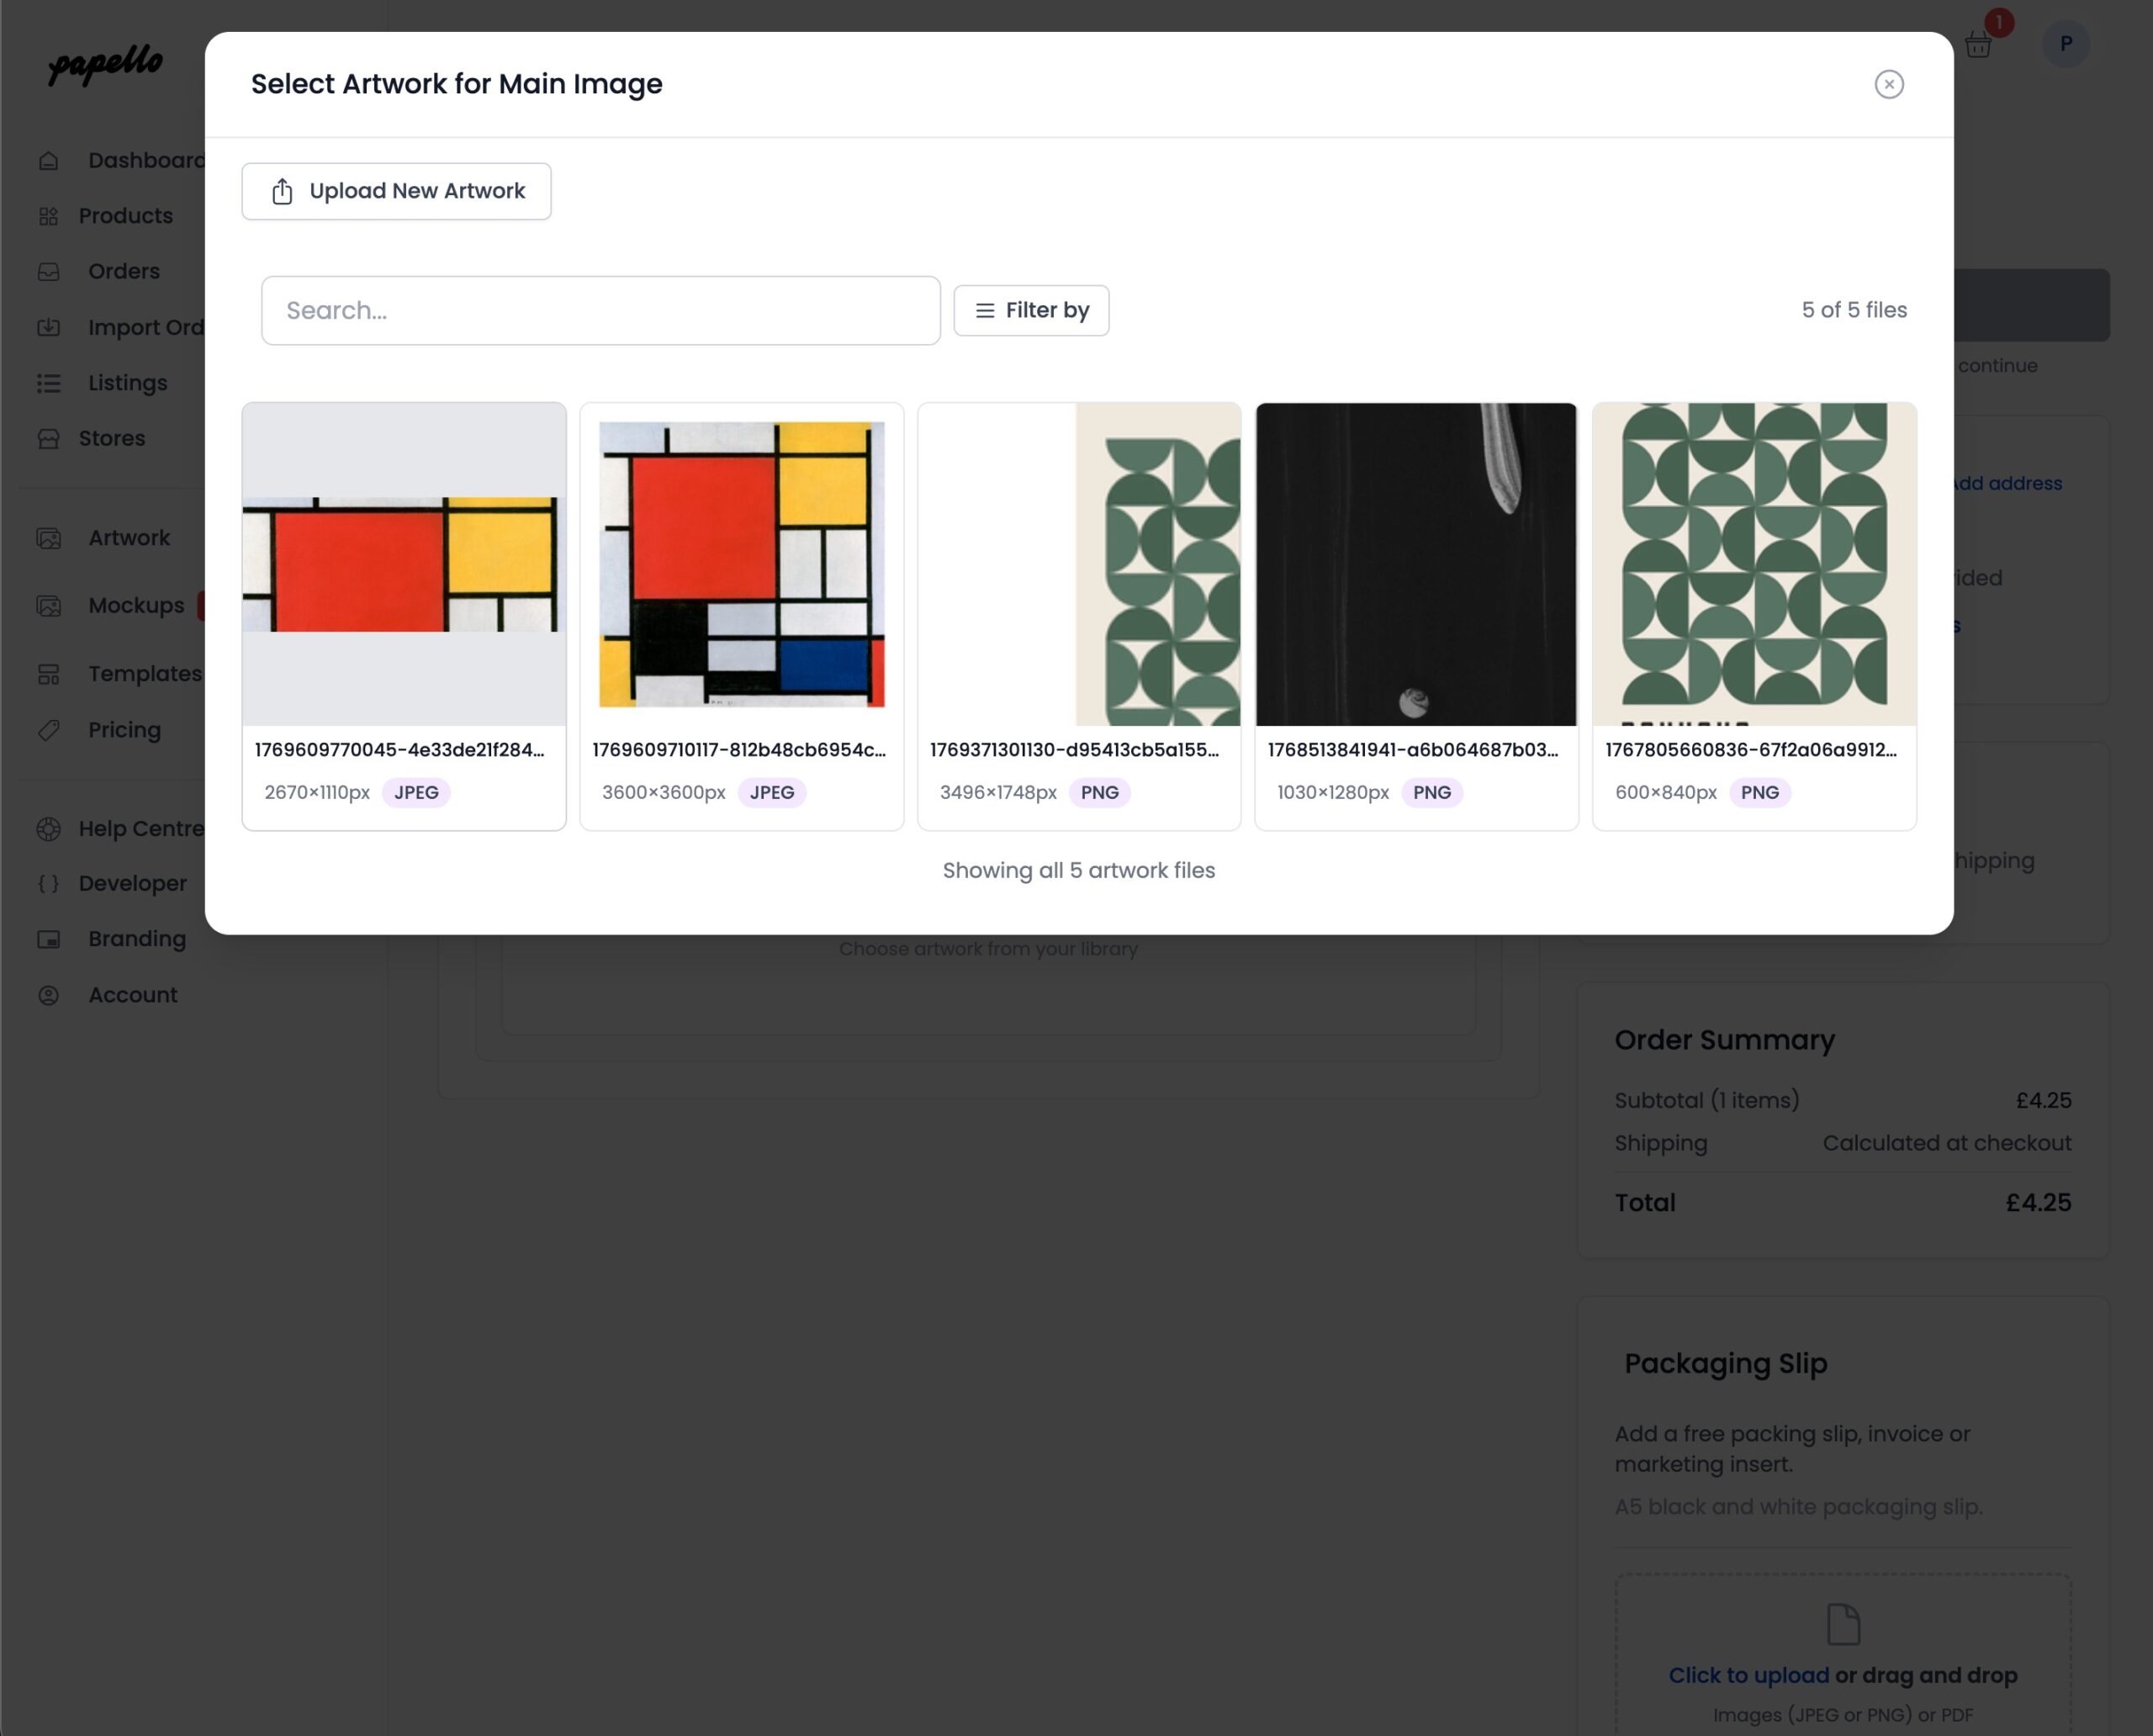
Step 8: Use the Template Artwork in an Order or Listing
Now let’s create an order or listing for the mug.
When selecting artwork, choose the file that was created from your template.
You’ll notice:
- The artwork fits perfectly
- The dimensions are correct
- No cropping or warnings appear
That’s the benefit of using a template — the artwork has already been prepared for the product.
When Should You Use Templates?
Templates are recommended when:
- Your artwork shape doesn’t match the product shape
- You want consistent placement across many orders
- You’re unsure whether artwork will fit correctly
- You want to avoid cropping or quality warnings
Not sure if your artwork will exactly fit the product?
Create a template first.